
How do I add or edit a Content Block?
Content blocks are the building pieces of your pages: a heading with three boxes of text, a row of big numbers, a list of upcoming auctions, a call to action. You build each block once, then add it to the pages where you want it to appear.
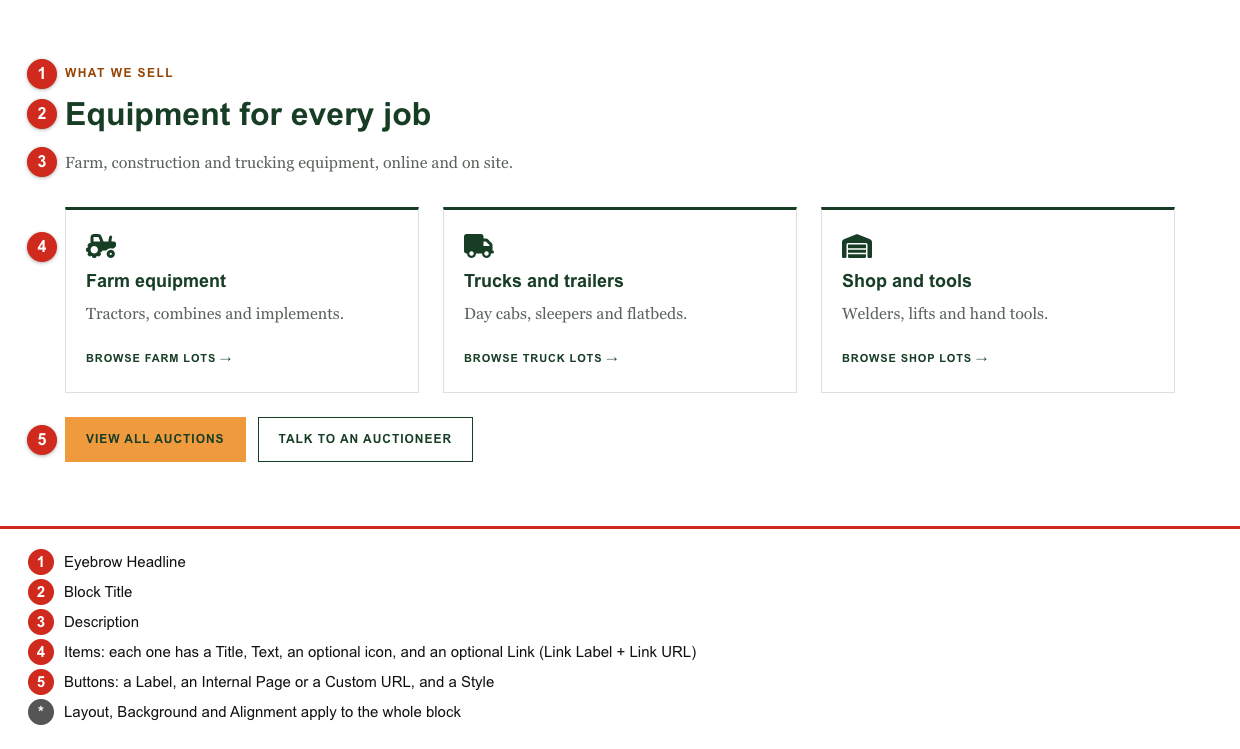
A block, with the field that controls each part.
More guides in this series
Not sure which layout to choose? See “Which block layout should I use?” for examples of each layout and when to use it.
Want to show your upcoming auctions? See “How do I set up the Auction Feed block?”.
Before you start
A block is separate from a page. You create the block first, then add it to a page. The same block can be added to more than one page.
Blocks appear on a page in the order you choose. They stack from top to bottom, each one full width.
Step 1: Create the block
In the control panel, open Content Manager. Use Add New to create a block, or Edit to change one you already made.
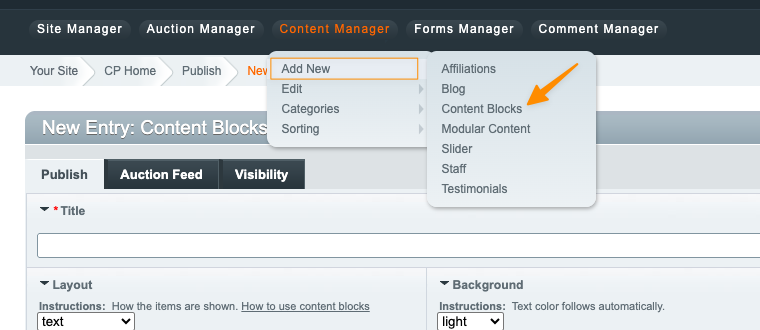
Content Manager, then Add New, then Content Blocks.
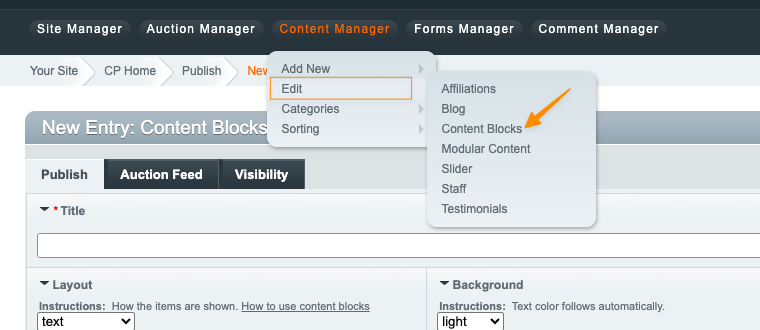
Content Manager, then Edit, then Content Blocks.
Give the entry a title so you can find it later.
Choose a Layout. This decides how the items are shown. Not sure which one to pick? See “Which block layout should I use?”. If you choose Auction Feed, follow “How do I set up the Auction Feed block?” after you create the block.
Choose a Background and an Alignment. Text color adjusts automatically with the background.
Fill in the text above the items. All three are optional:
Eyebrow Headline: a small label above the title, for example “Selling now”.
Block Title: the block’s main heading.
Description: a short intro, one or two sentences.
Add Items (up to 4). What each one shows depends on the layout. For each item you can fill in:
Title / Value: the item’s heading. In a Stats block this is the number, for example “1,200+”.
Text: a short line. In a Stats block this is the label under the number.
Font Awesome icon: optional. Pick one from the list, or leave it as
--for no icon.Link Label and Link URL: the item’s link. The link only shows if both are filled in.
Open in New Window?: check this if the link should open in a new tab.
Add up to 2 Buttons under the block. For each one:
Label: the text on the button.
Internal Page: pick a page on your own site. Or type a Button Custom URL. If you fill in both, the Custom URL wins. For a phone number use
tel:+1XXXXXXXXXX.Style: Primary (filled, for the main action) or Secondary (outlined, for a quieter second action).
Save the entry.
Here is the block from the picture at the top, as it looks in the form. The third item links to another website and opens in a new window. The first button uses the Internal Page list, and the second uses a Custom URL.
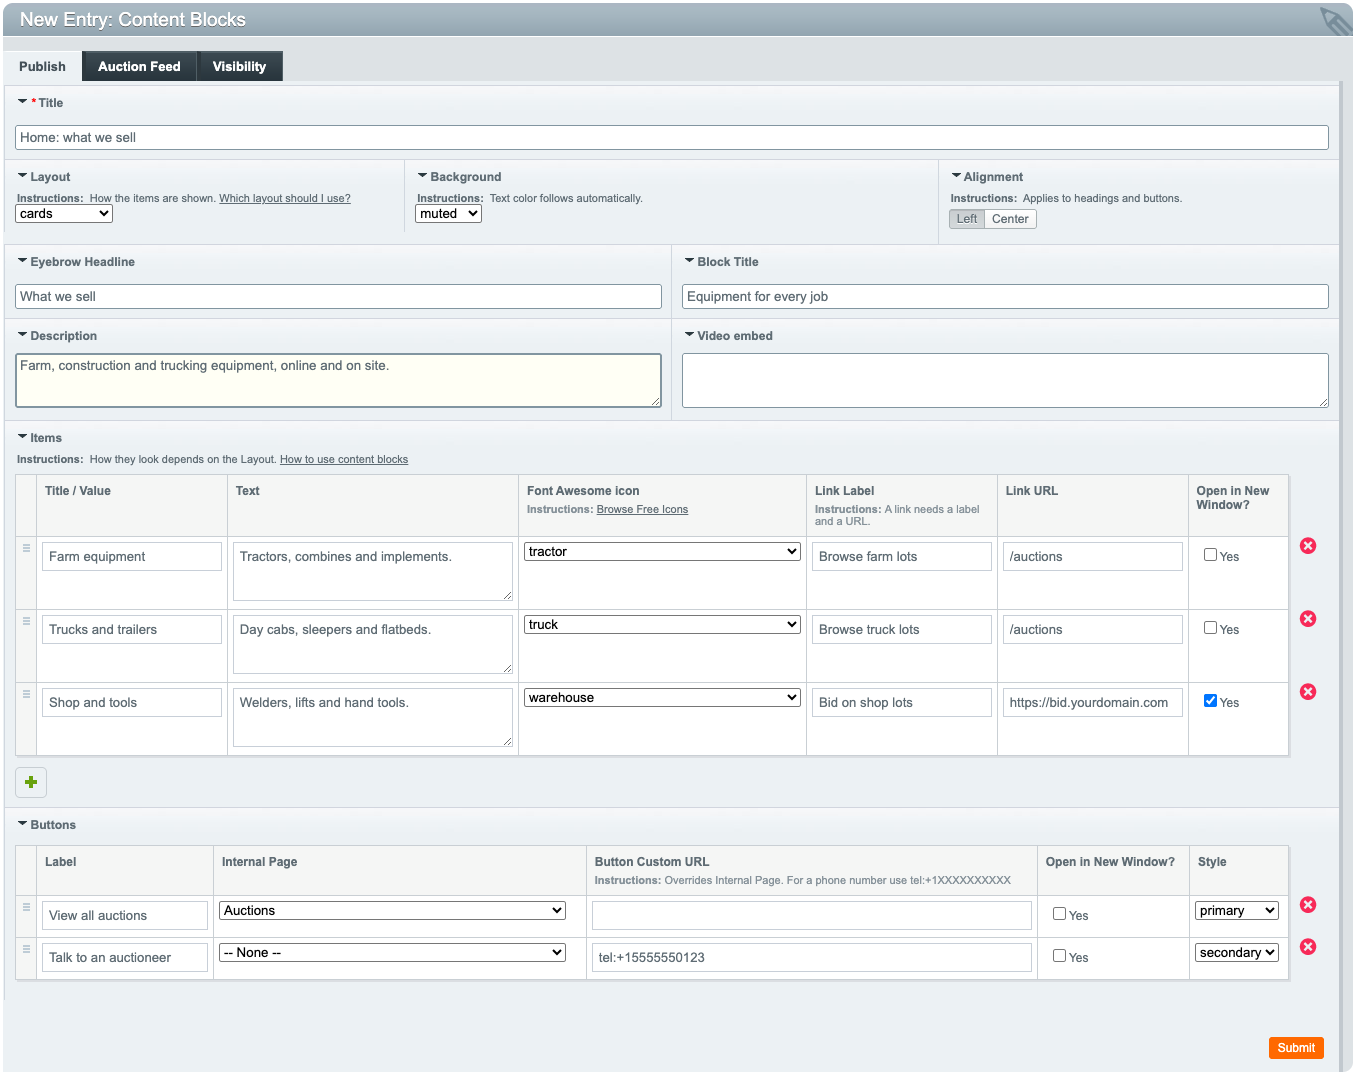
The Content Blocks form, filled in.
Step 2: Add the block to a page
Open the page you want to edit.
Scroll to the Content Blocks field.
Add the block you created. Add more blocks to build the page. They show in the order they are listed.
Save the page and view it on your site.
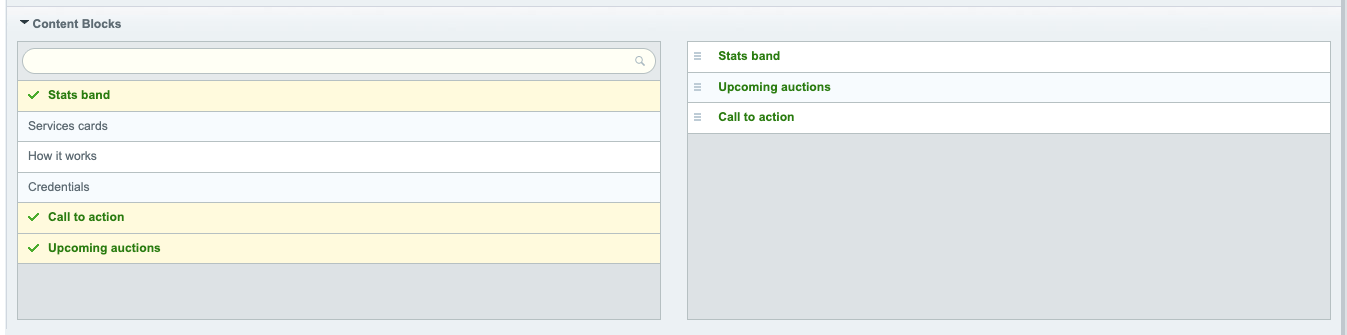
The Content Blocks field on a page: choose blocks on the left, drag them into order on the right.
Step 3: Check how it looks
Open the page on your site. Look at it on a phone too: the items stack into one column on small screens, and that is normal.
A few rules that surprise people
Items: up to 4. One item stretches across the whole row. Two to four items share the row. The number of columns depends on screen width, not on a setting.
Item links: if you fill in only the Link Label or only the Link URL, no link shows.
Buttons: a Custom URL always wins over the Internal Page.
Video: to add a video, paste the whole embed code from Vimeo or YouTube, including the closing
</div>. A Vimeo video must be set to Unlisted, not password protected.Keep text short: long text in narrow columns reads badly. See the examples in “Which block layout should I use?”.
Keep reading
Which block layout should I use? Examples of every layout, with when to use each one and when to skip it.
How do I set up the Auction Feed block? Show your upcoming auctions on a page.
Still need help?
Contact BidWrangler Support at helpdesk@bidwrangler.com