
Category Import Guide
While categories and subcategories can be created one at a time from the Categories page or when editing items, they can also be created in bulk via .csv file import.
Creating the Category Import .CSV File
The following steps will explain how to create a category import file for uploading into BidWrangler, but you may also click here to download a pre-made category import template.
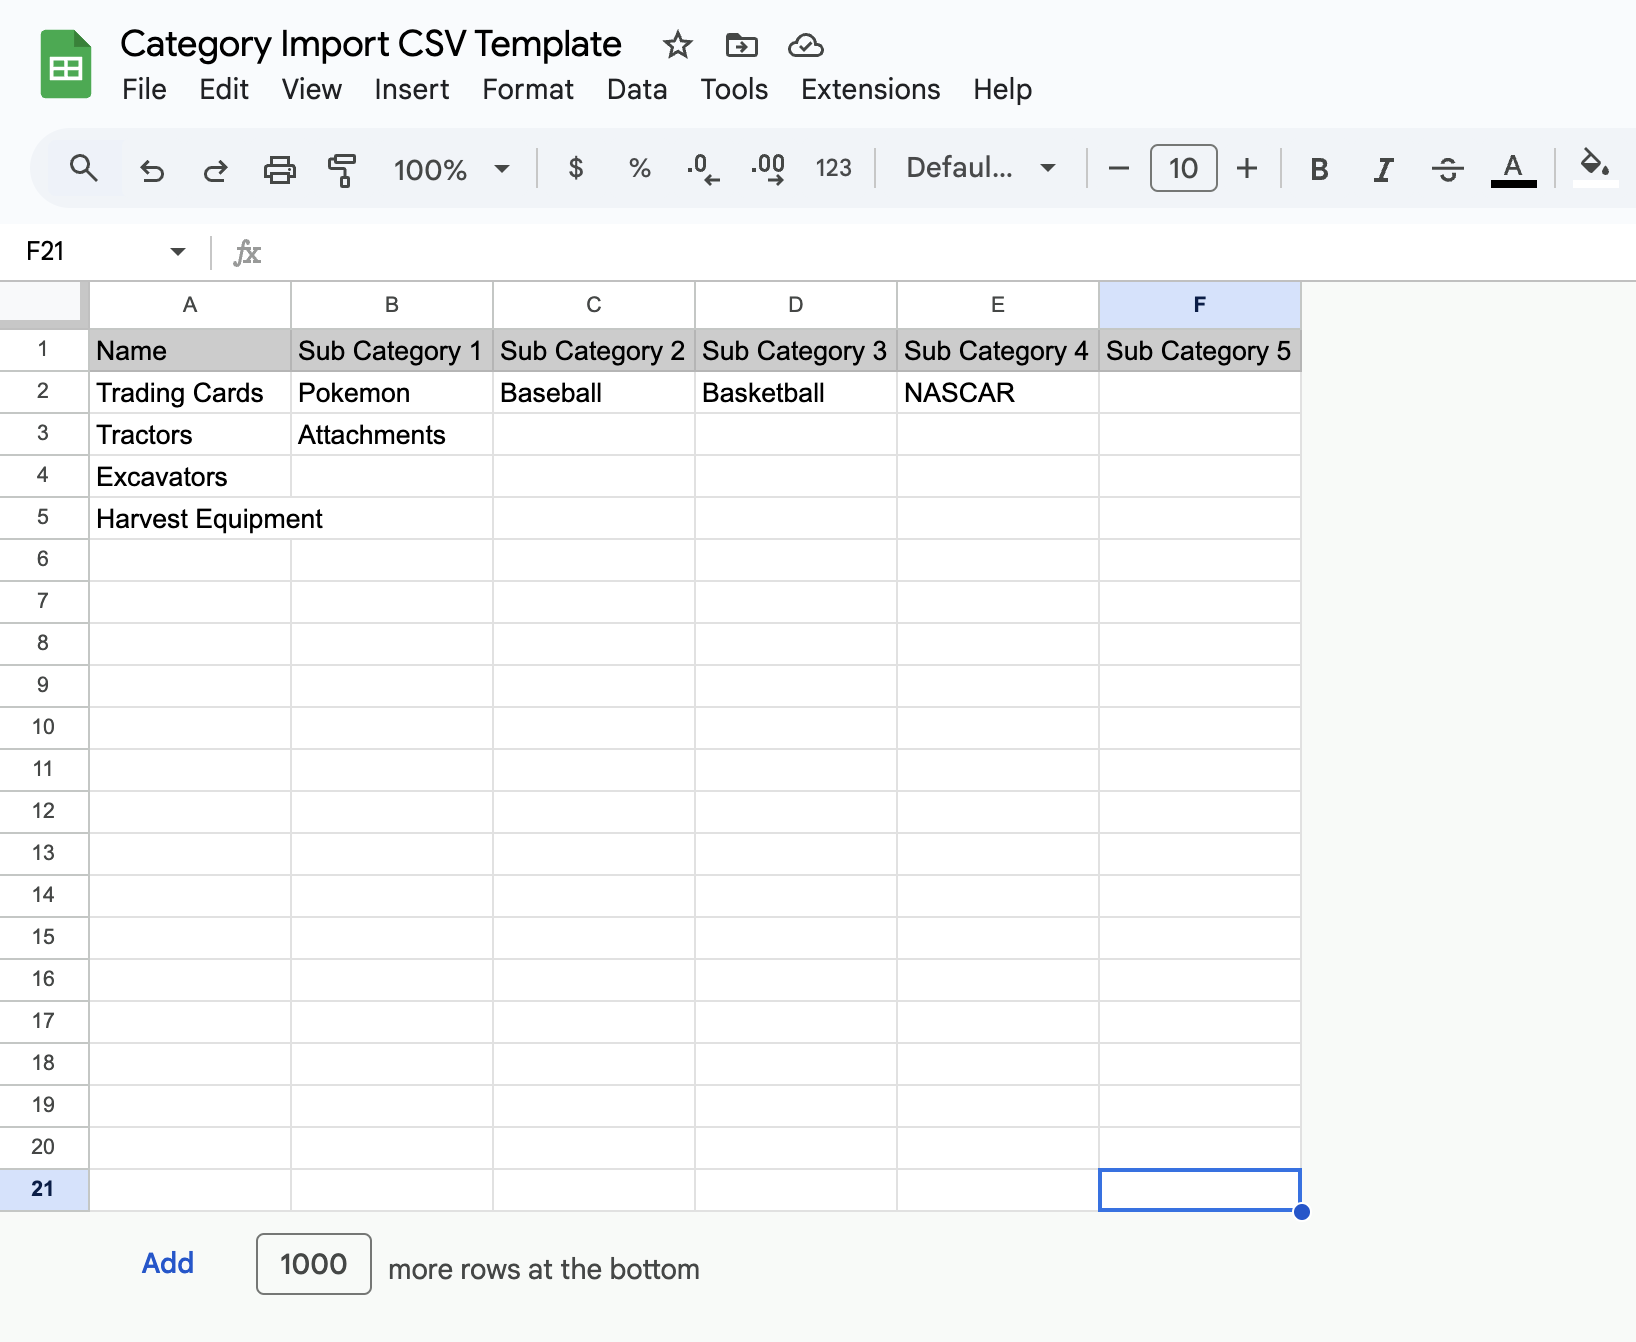
In your spreadsheet software, add column names in row 1 for the category name (required) and up to five (optional) subcategory names. Then, fill out the cells below with the categories and their optional subcategory names that you would like to import into your bidding platform. See an example from the downloadable template in Google Sheets below.
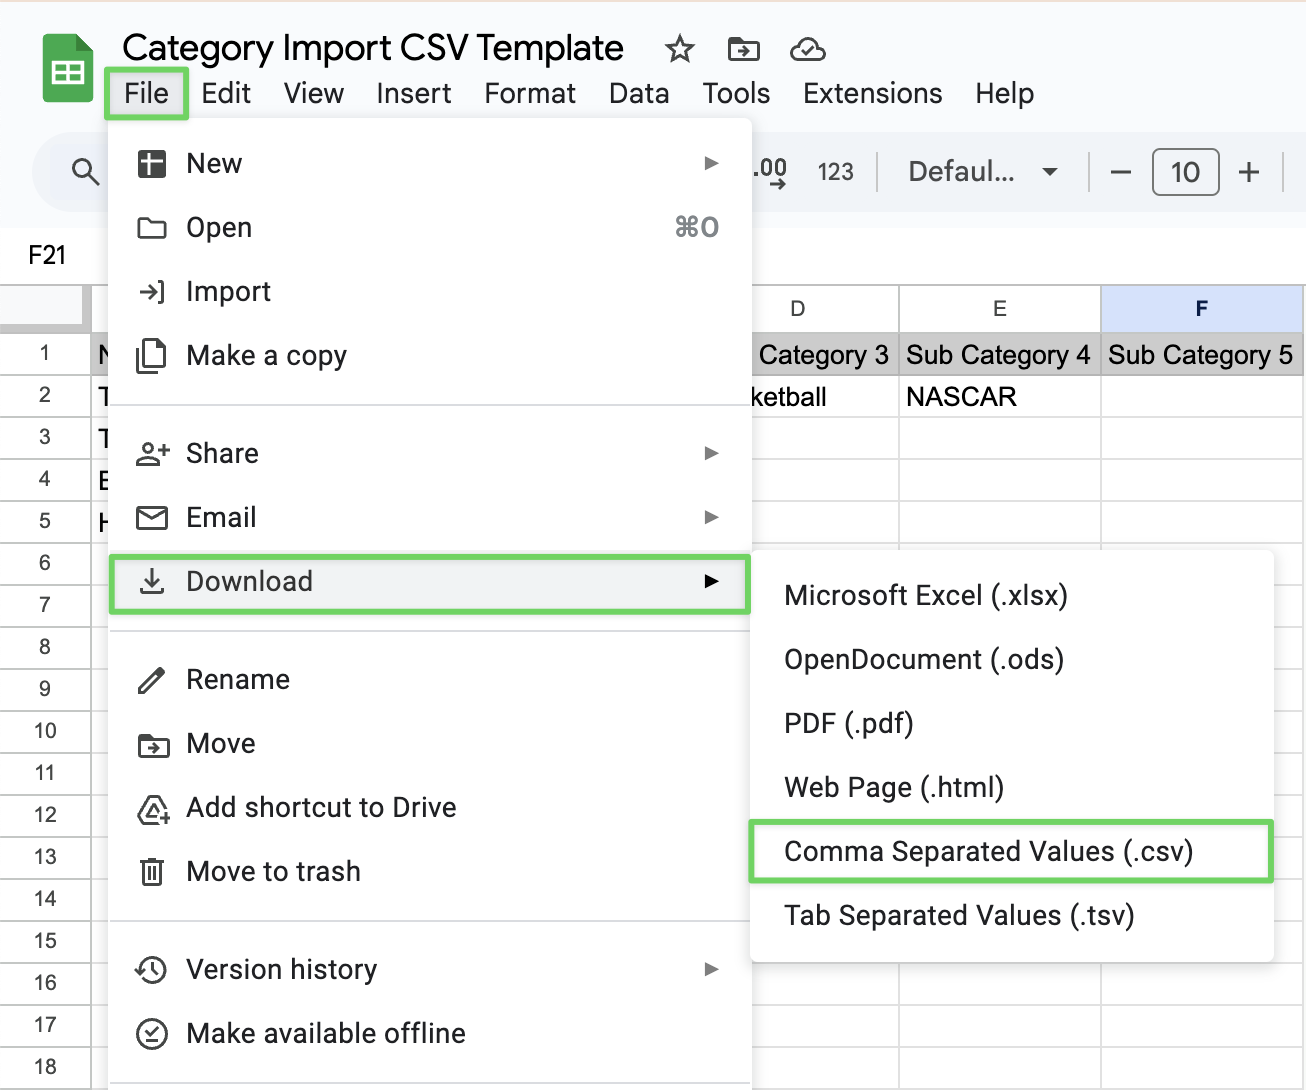
When your spreadsheet is complete, export a .csv (Comma Separated Values) file for importing into the platform.
Executing the Category Import
To import categories in bulk using your newly created .csv file, log in to your Admin Portal with Admin permissions and navigate to "Categories Imports" to access the Administer Categories Imports page.

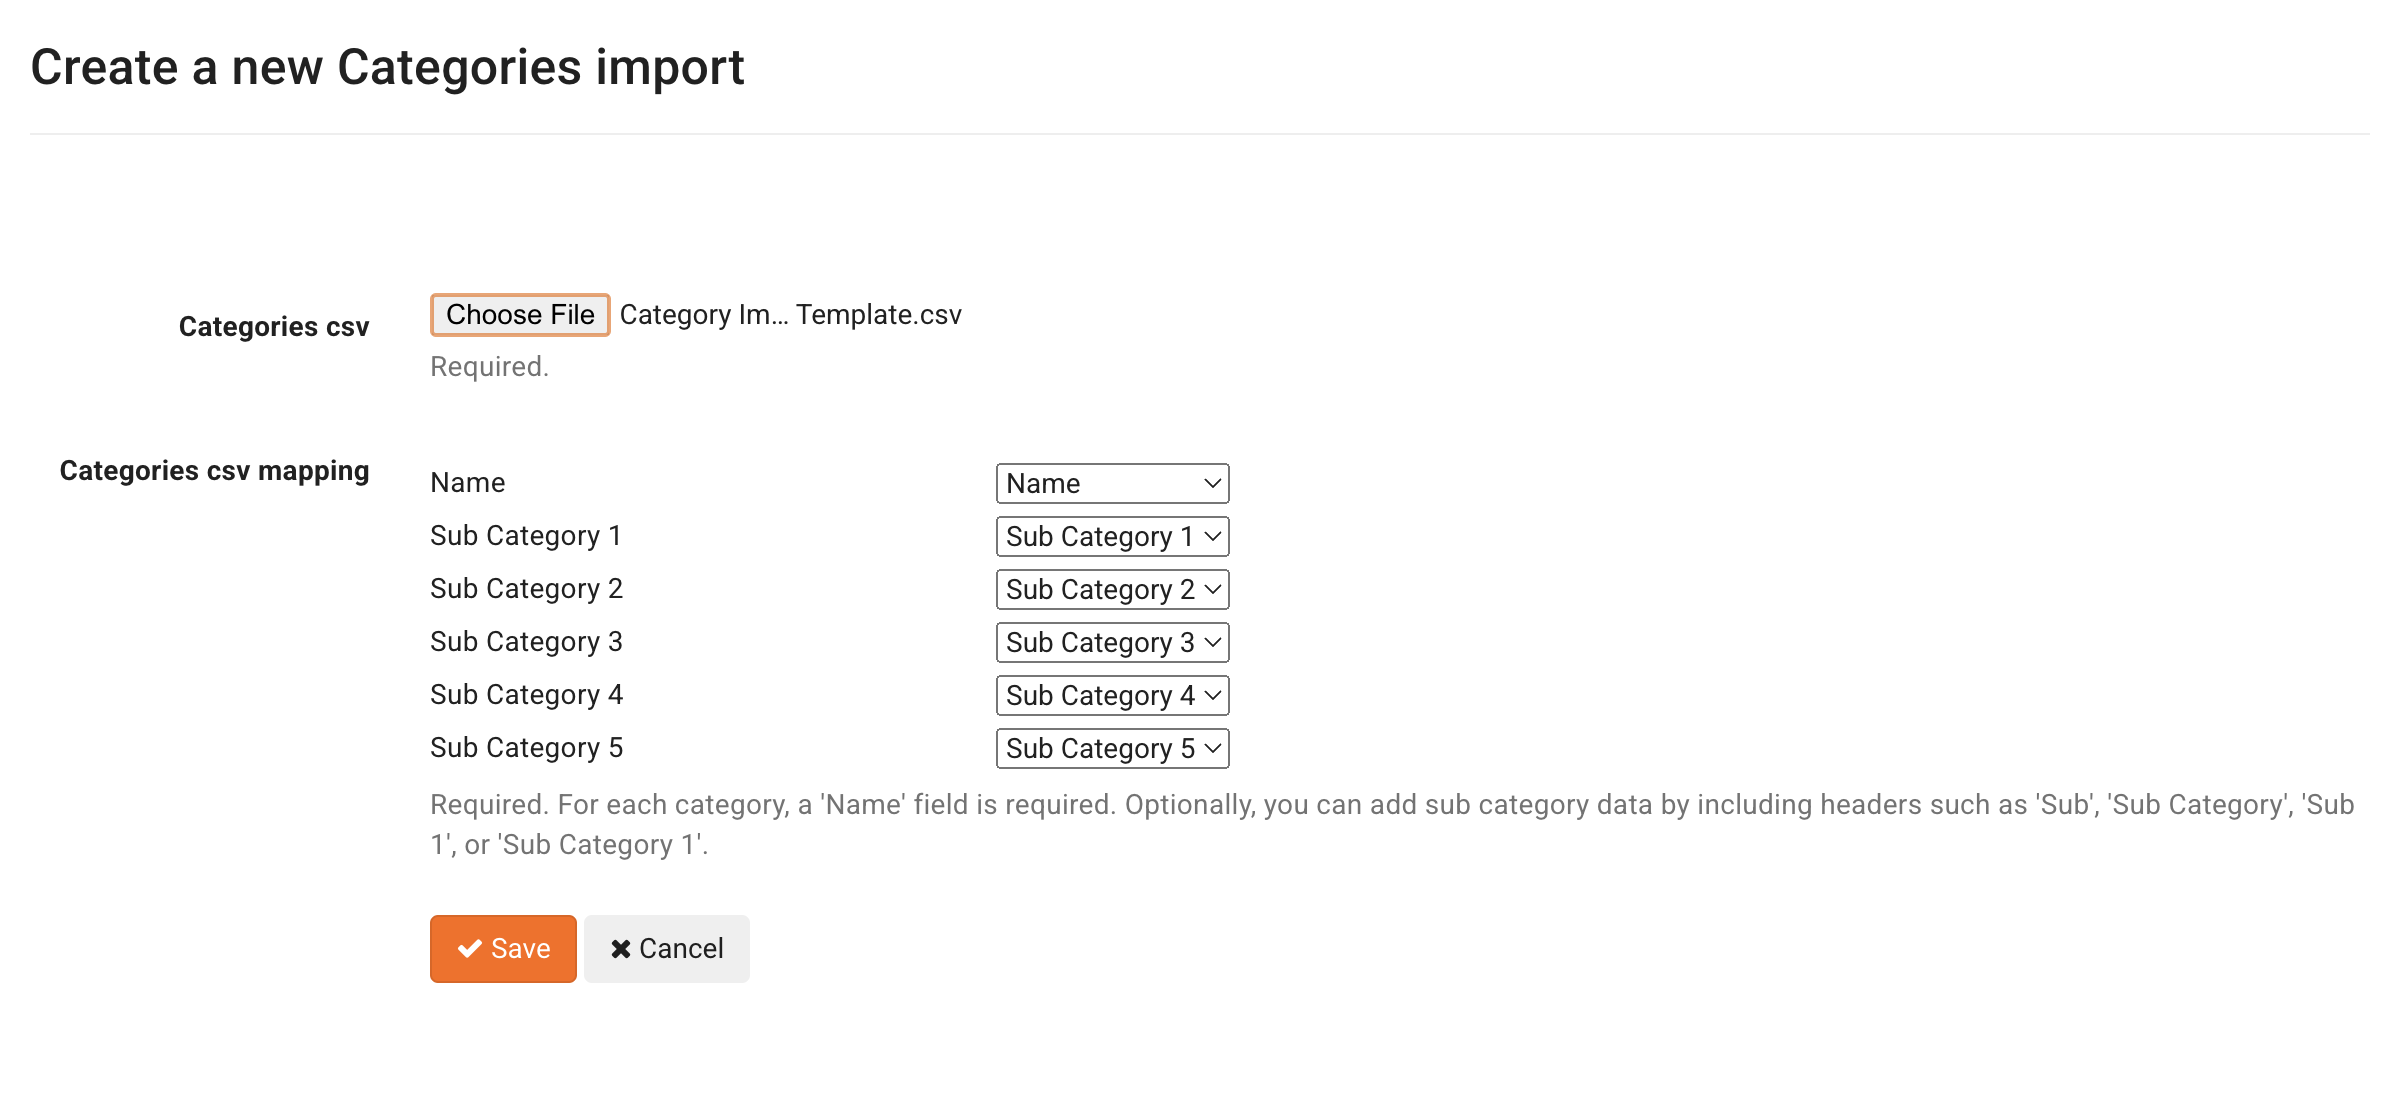
Click "Create" to initiate a new import. From this screen, click "Choose File" and select the .csv file for the category import you wish to run. Ensure that the column header names are mapped correctly, and then click "Save" to begin the import.
Running the import will return you to the Administer Categories Imports screen, where you can refresh the page to monitor the progress of the import. Once the status updates to "done," if there are any errors, click on the "i" icon to view the report and the reasons for any categories that were not imported. You can view all successfully added categories and subcategories from the Categories page, and each will become immediately available for assignment to items.
If you have any questions about correcting errors or the operation of this import, please contact us at helpdesk@bidwrangler.com.