How do I set up a Stripe billing account?
How do I set up a Stripe billing account?
The BidWrangler platform utilizes Stripe for capturing credit card information to register bidders. A company may set up their own Stripe account to capture credit card information, and manually charge bidders one by one. This is used in cases such as a required cash deposit at auction close, or for charging a bidder who has not paid an invoice.
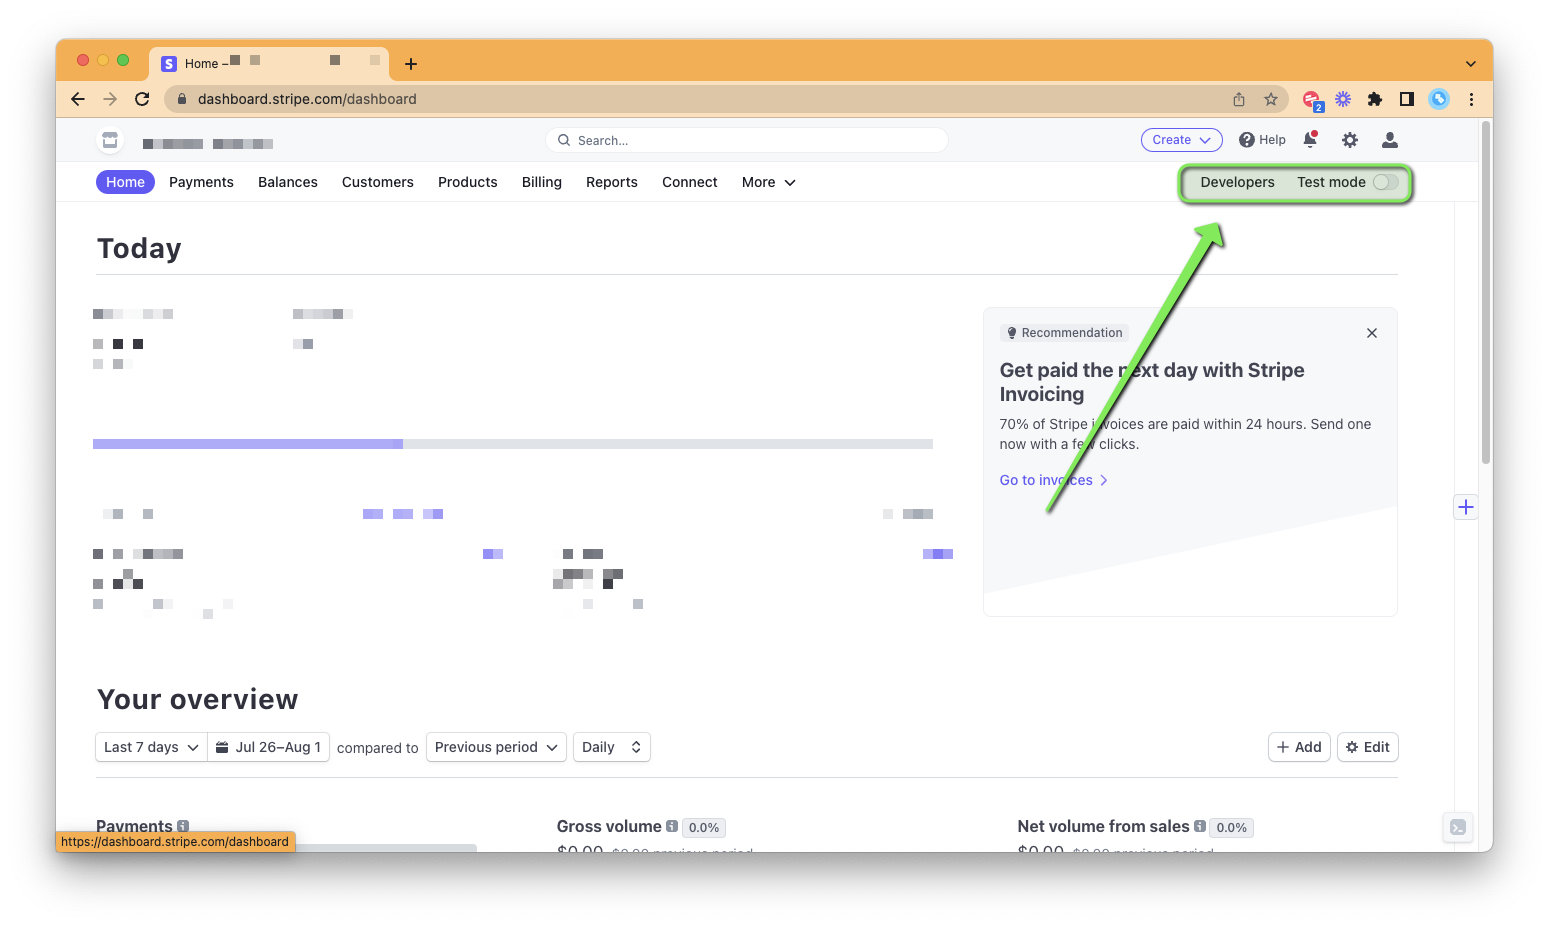
First, go to Stripe.com and create an account here. Once that process is completed, make sure that the account is in "LIVE" mode, and not "TEST" mode. While in "TEST" mode, the account will be unable to process transactions. Next to "Test Mode" switch in the top right of the dashboard, select "Developers".
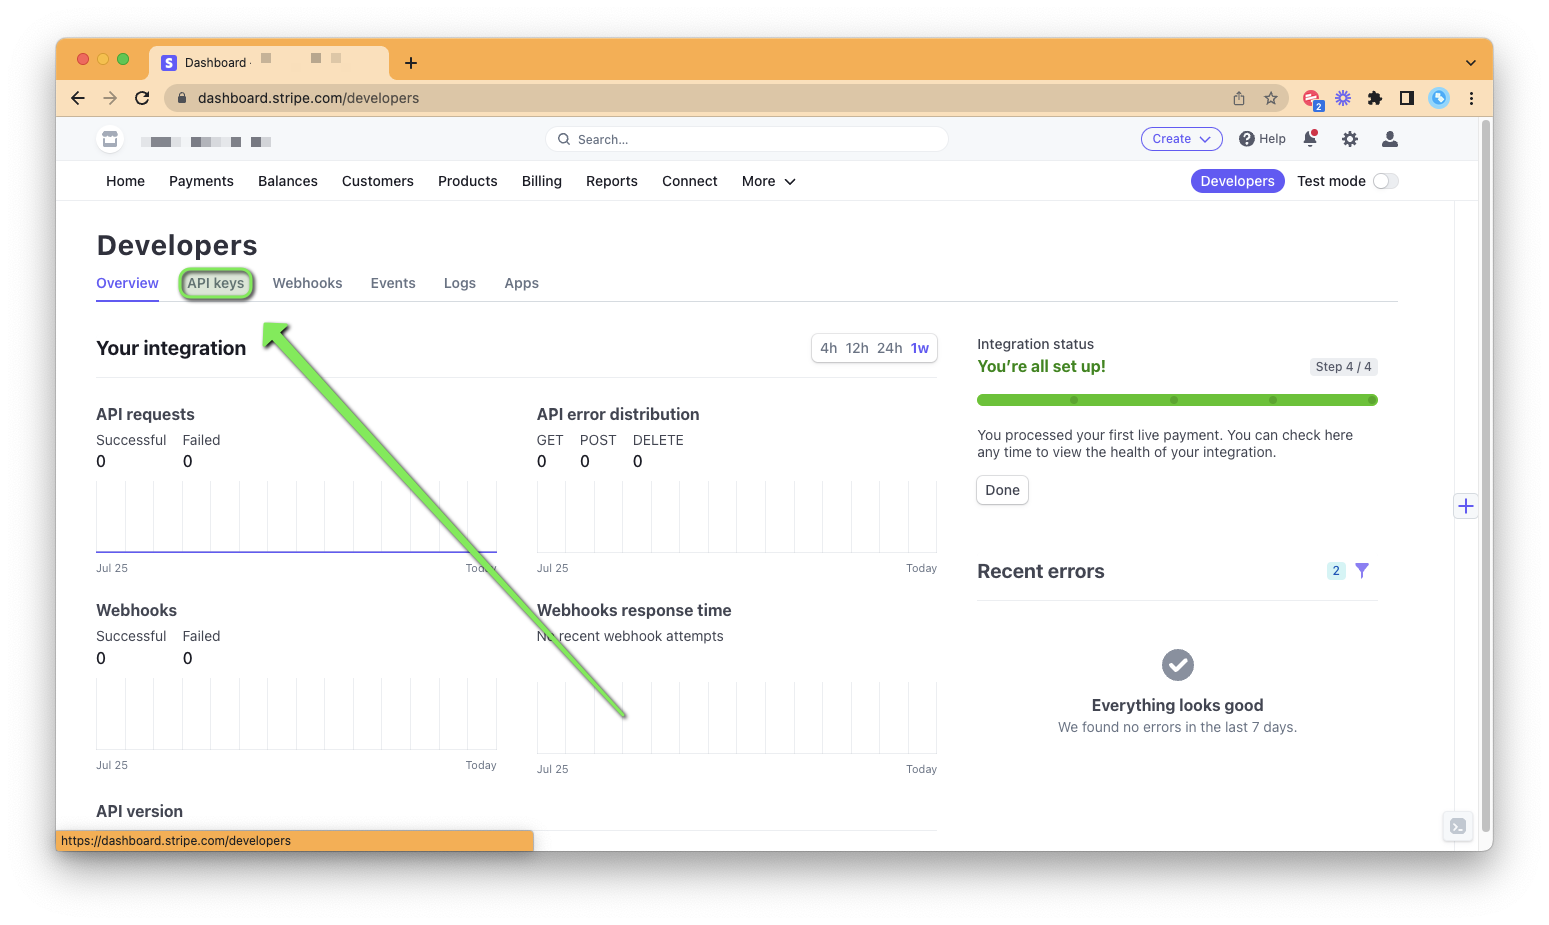
Then, click on the "API" option from the Developers dashboard menu:
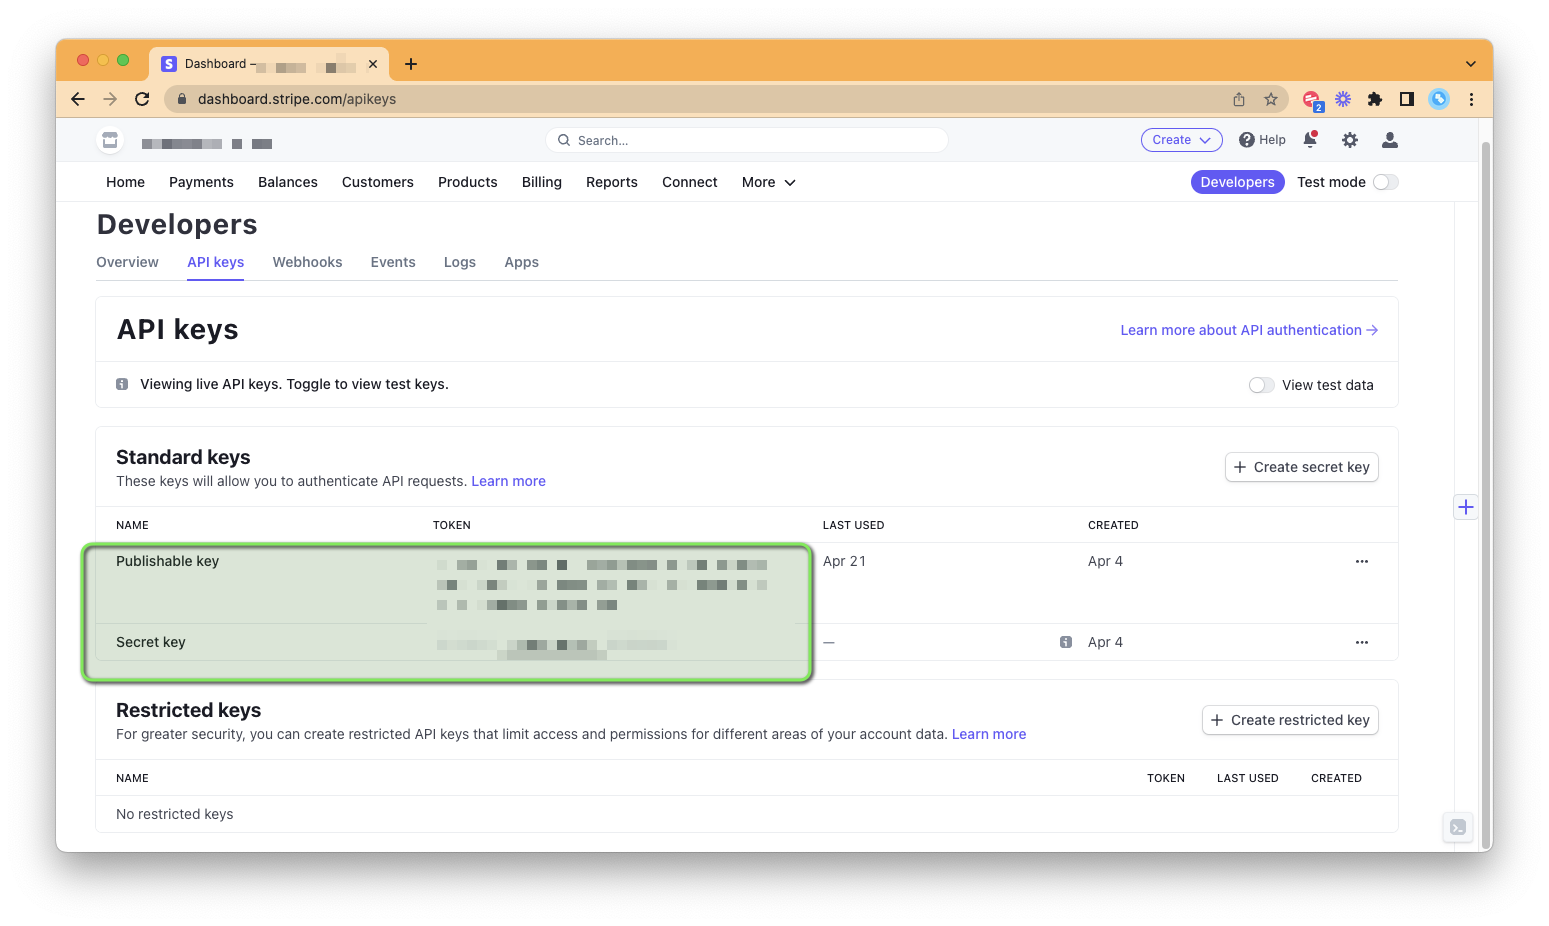
API keys and tokens will appear on this screen. Copy the Publishable and Secret keys:
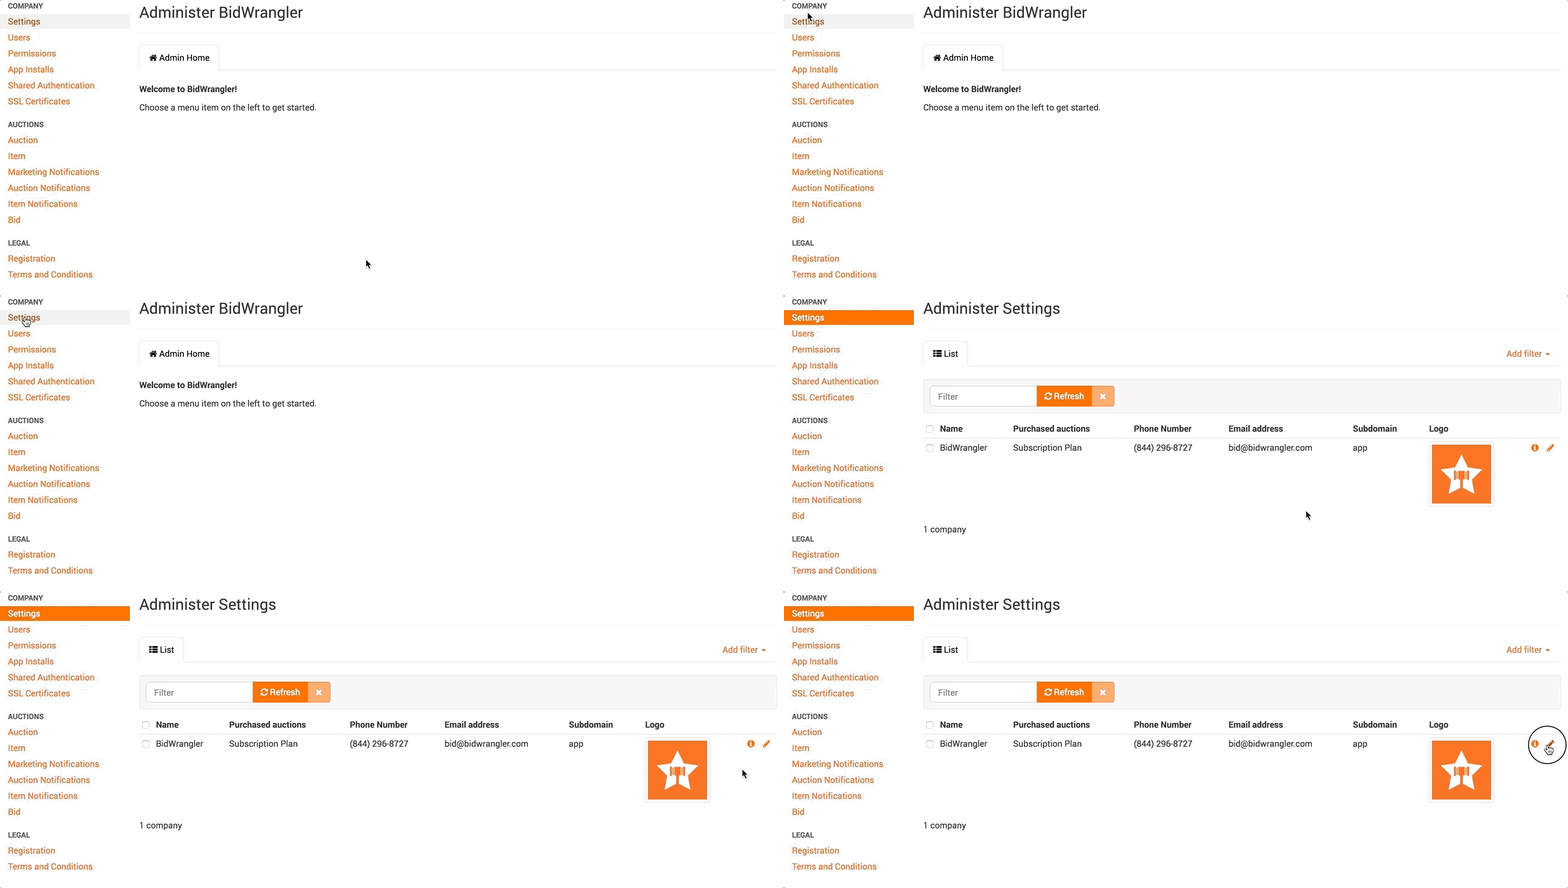
Each of these tokens will need to be copied and pasted into your company's BidWrangler Admin Portal. Open in a new browser window your app's Admin Portal, and go to "Company" --> "Settings" --> "Edit" -
Scroll down and expand the API Integrations section. Copy the Stripe "Live Publishable Key" and paste it in the "Payments Public Key" field, then copy the Stripe "Live Secret Key" and paste it in the "Payments Private Key" field. Next, select from the "Payment Gateway Name" dropdown as "Stripe" -
Finally, scroll to the bottom of the page, and click "Save" to complete -


