How do I use the Checkout Page?
The checkout page allows you to easily record items that a bidder has won per auction invoice. It allows you as the auction company to specify the item location, whether onsite or offsite, for each item on an invoice. One typical workflow for utilizing the checkout screen:
Bidder pays for invoice
Bidder picks up items
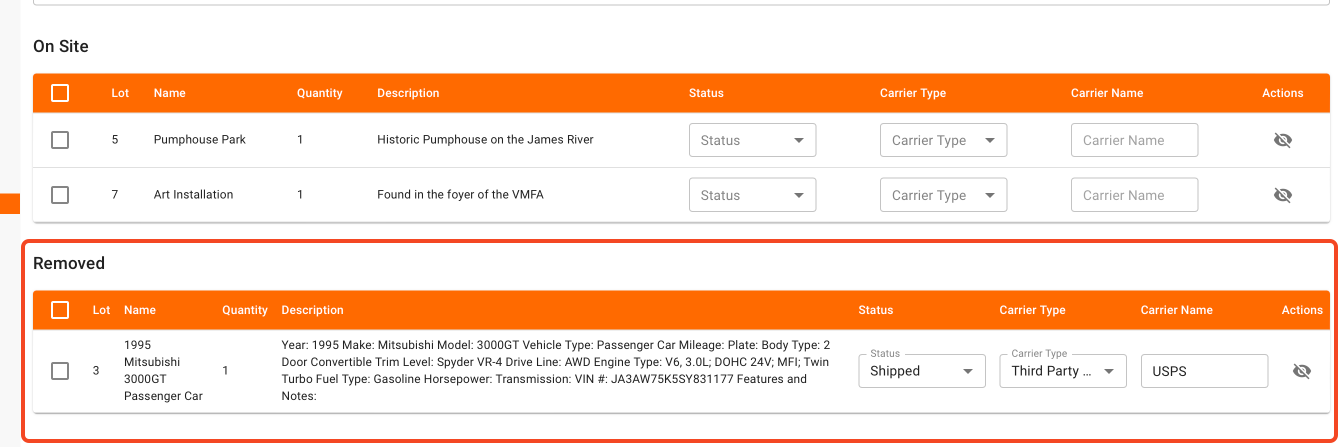
When the bidder leaves the auction facility, they can give their printed invoice to a staff member who inspects their items. The staff member then marks each of the items on the invoice as picked up, shipped, or with any other relevant status via this new checkout page
This way, the location of each item is accounted for whether it was picked up, shipped and how, as well as a variety of other statuses.
In the Admin Portal, click on "Checkout" on the left side of your admin portal:

Enter an invoice number in the first field and hit enter {no need to include the version/last two numbers}. The screen will pull up all the items on the invoice by default in the "on site" category.
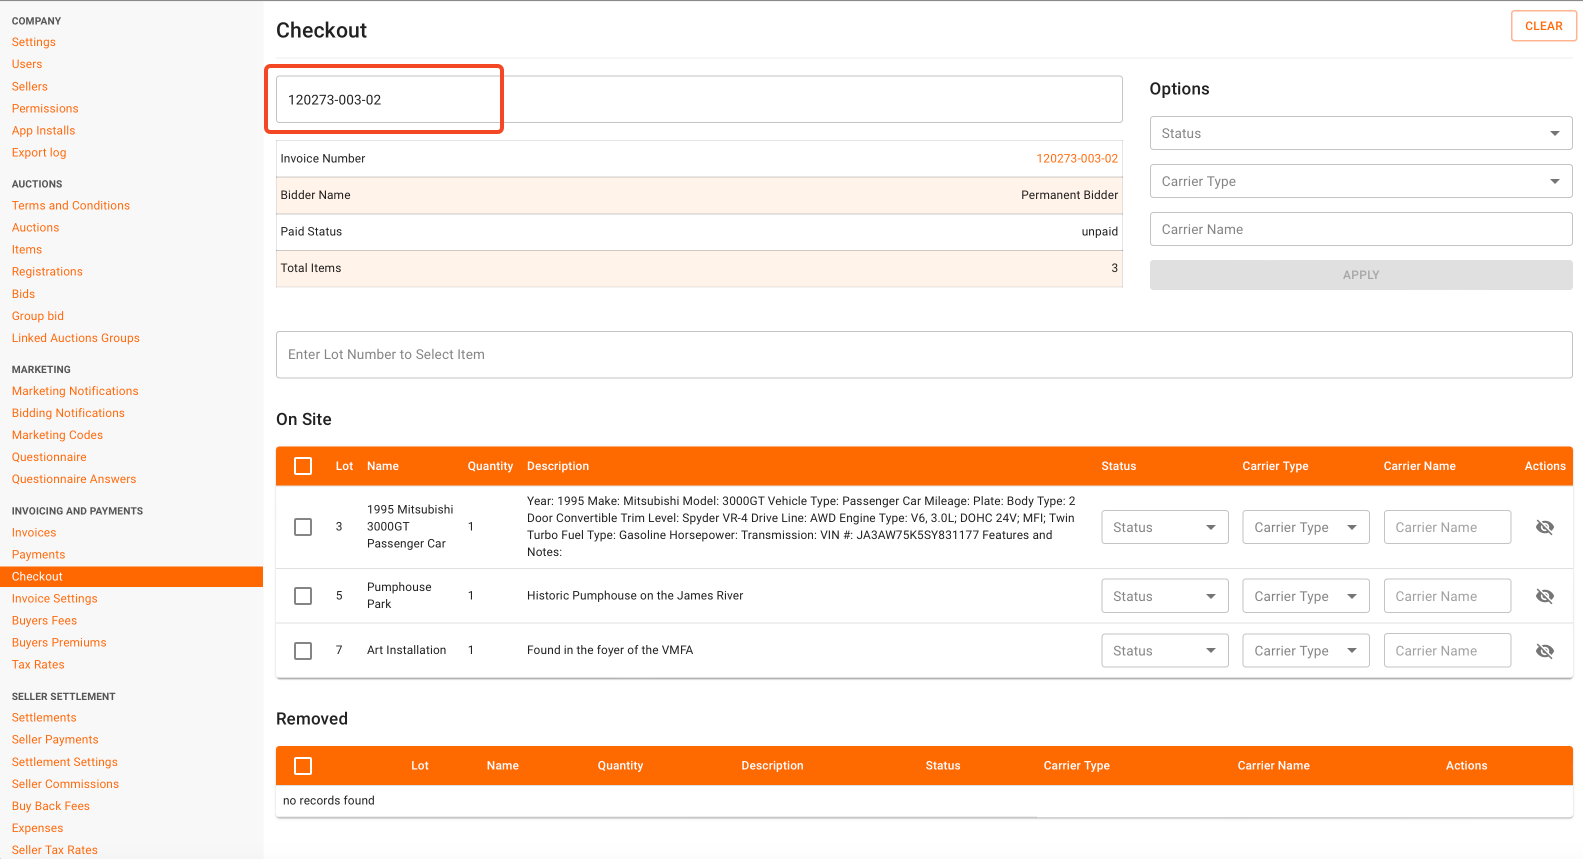
You have the option to edit items in bulk, or one by one.
To edit in BULK follow these steps:
Under "Options" choose a status (required) and carrier type (optional) and carrier name (optional).
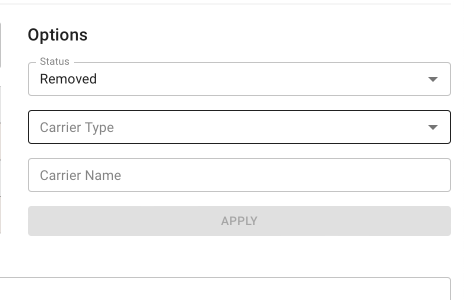
Using the checkboxes, choose the items to which you'd like to apply this status utilizing the checkboxes. Once you've selected the proper items, click on "Apply" in order to mark the selected items with the chosen status.
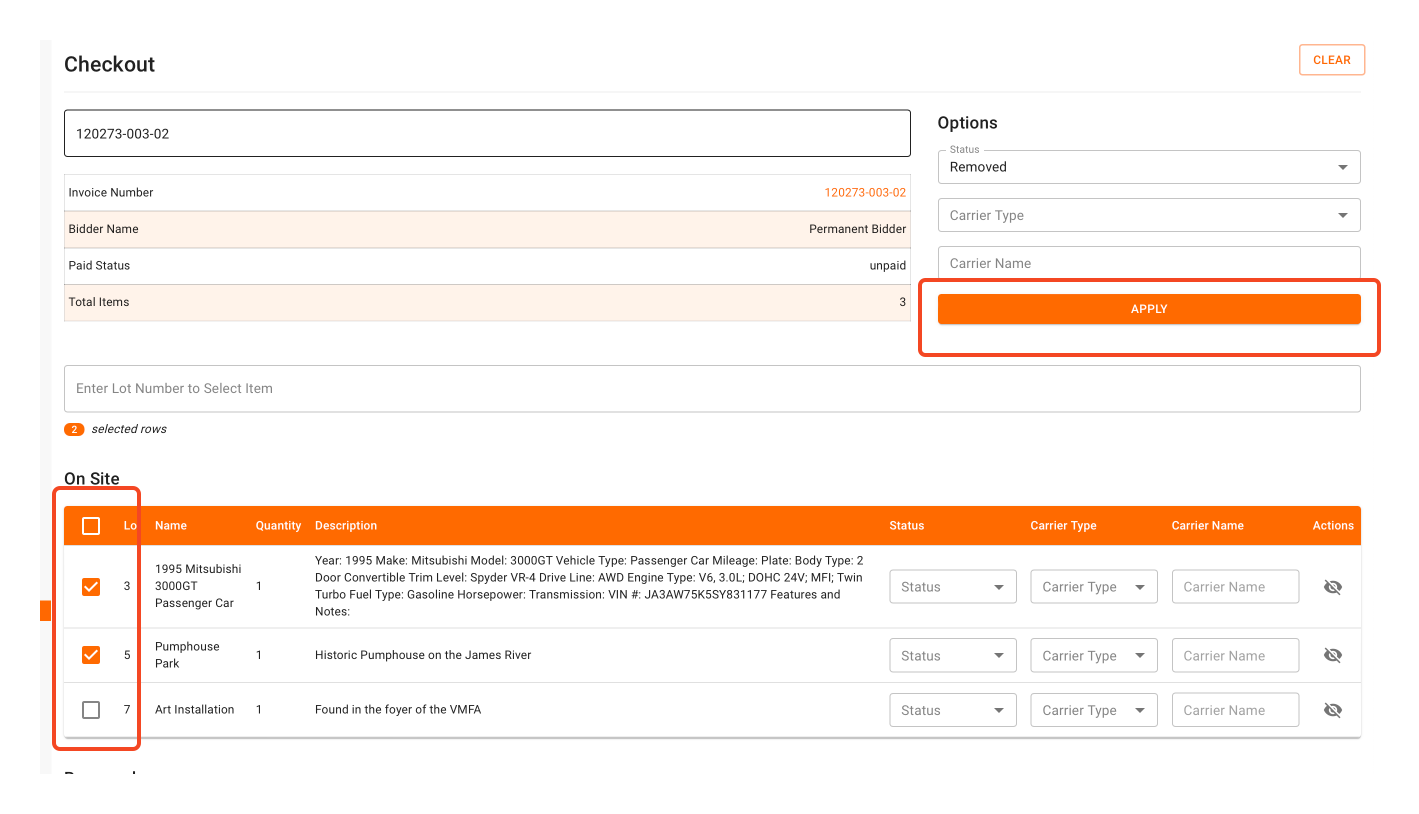
The removed items now show up under "removed" with the appropriate status indicated.

Edit status individually:
In order to do this, simply utilize the drop-downs on each particular item to indicate the status.

Once you make your selection, the item will be updated, and display under the "removed" list if an appropriate status is chosen: