
How do I use the new Photo Manager screen?
The new Photo Manager screen provides a one-stop place for managing the images in an auction catalog. There are a variety of functions we can do on this screen such as:
View photos
Export photos in bulk or individually
Delete photos
Copy and move photos
Rotate image
Edit contrast, brightness, and saturation
Crop images
Link to item/photo import
Finding and Navigating the Photo Manager Screen
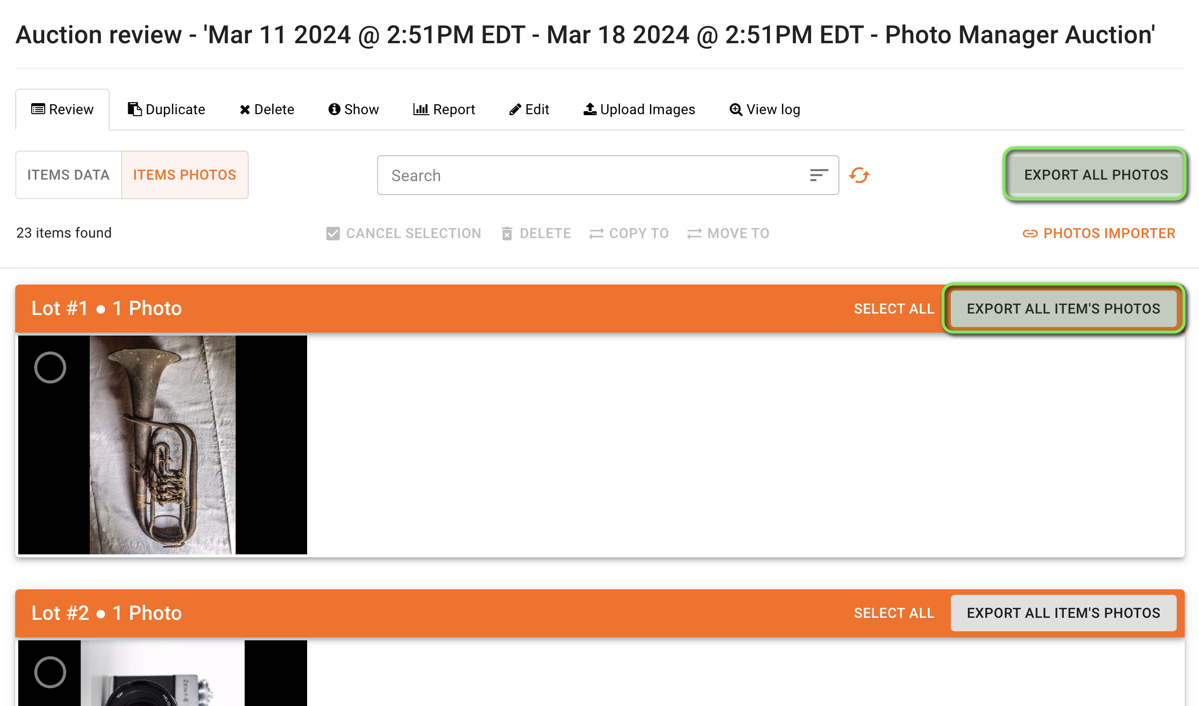
You will find the new Photo Manager Screen built-in to the Auction Review Screen. Simply navigate to the Auction Review screen of any auction and you will find a new button entitled "ITEMS PHOTOS" that will convert the screen to the Photo Manager Screen.
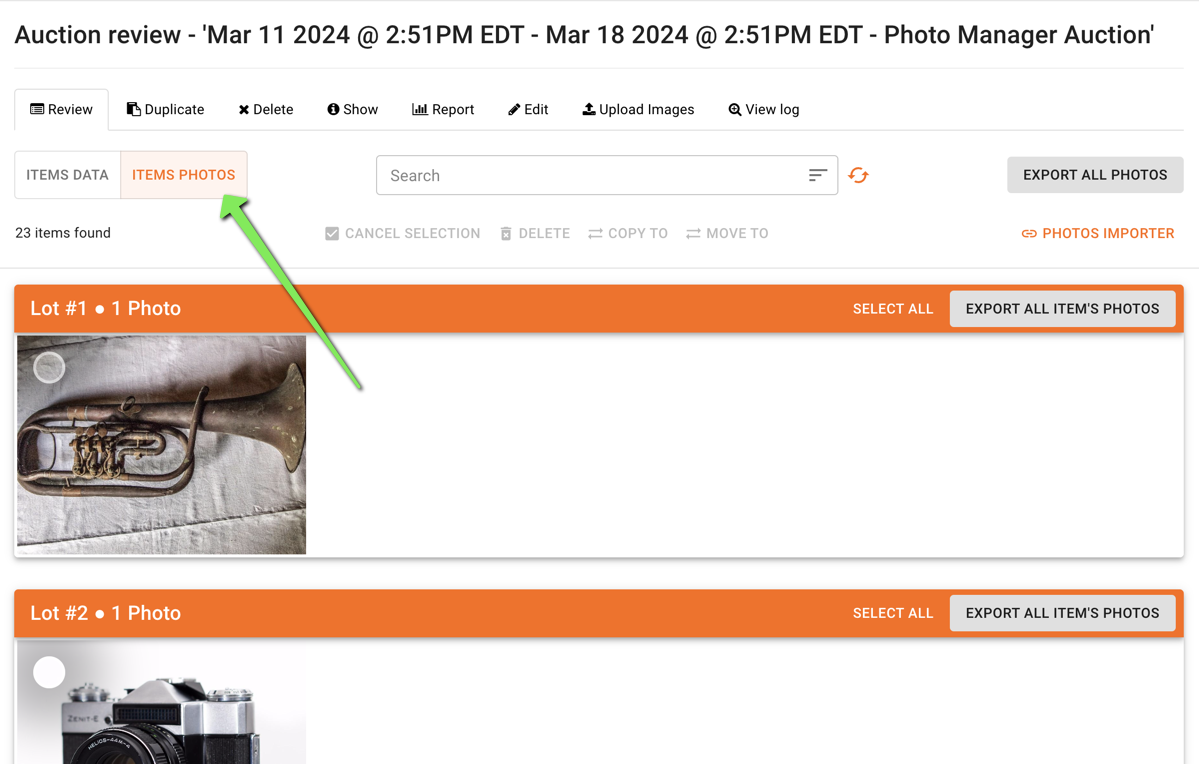
From this screen, you can easily scroll through the images of all items. The items search/sort at the top of this screen allows you to quickly locate a specific item or items.
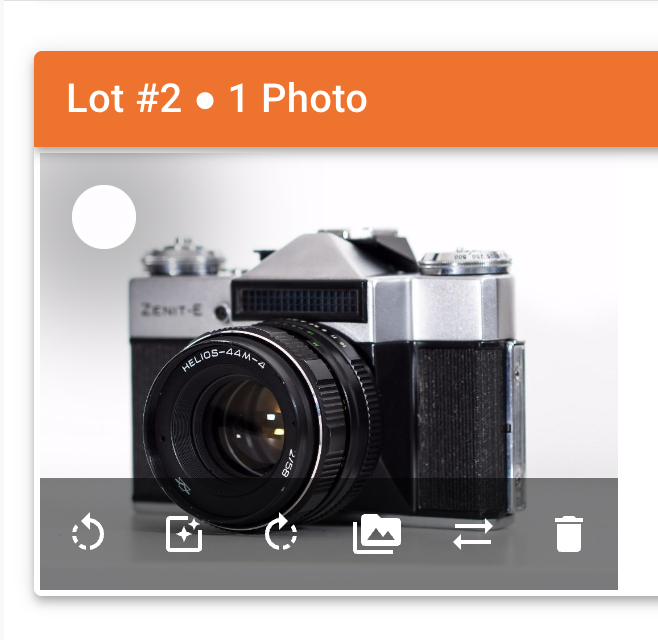
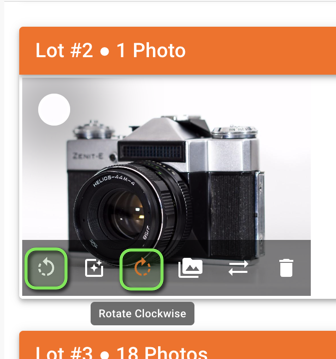
The various functions on this screen are broken up into individual photo tools and selected photo tools. Hover over any specific image to bring up a toolbar of individual image editing tools:
Select any image via the circle in the top left of every image, Shift+Click multiple images, or click on "SELECT ALL" on any lot to present bulk tools for deleting, copying, moving, or deselect all will show up in the selected images toolbar. This toolbar is located at the top of the screen, but will follow as you scroll through the catalog.
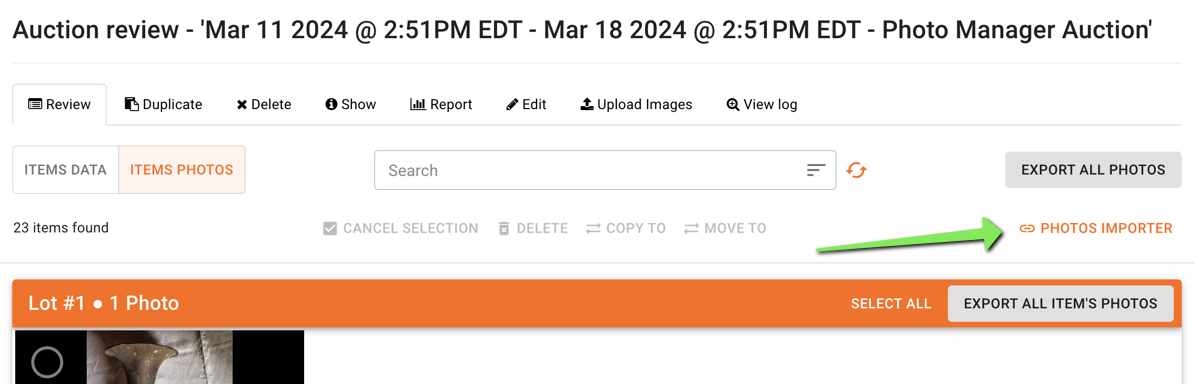
Additionally, there is a button that links you to the items/image import for that auction entitled "PHOTOS IMPORTER" on the right of the toolbar.
Copy and Move Images
The Photo Manager Screen offers a multitude of ways to move images from one lot to another. Images can be dragged and dropped from one to another, or selected and copy/moved to the desired lot numbers. Use lot numbers that don't exist to create them on-the-fly.
Drag and Drop
For individual lots, you may simply drag and drop any specific image by click/holding down on any specific image then dragging it the desired lot. When you let go of the image, it will ask if you want to move the photo to that lot. This also works for changing the appearance order of images within a specific lot.
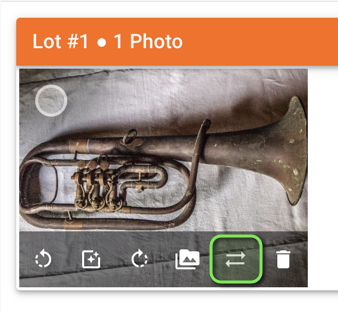
Move Photo Button
Hovering over any image will present a toolbar of options. One of these buttons is the Move Photo button. If you know which lot you would like to move the photo to, you can click on this button and type in the Lot ID Number/s that you would like the image moved to.
Selected/Bulk Move To
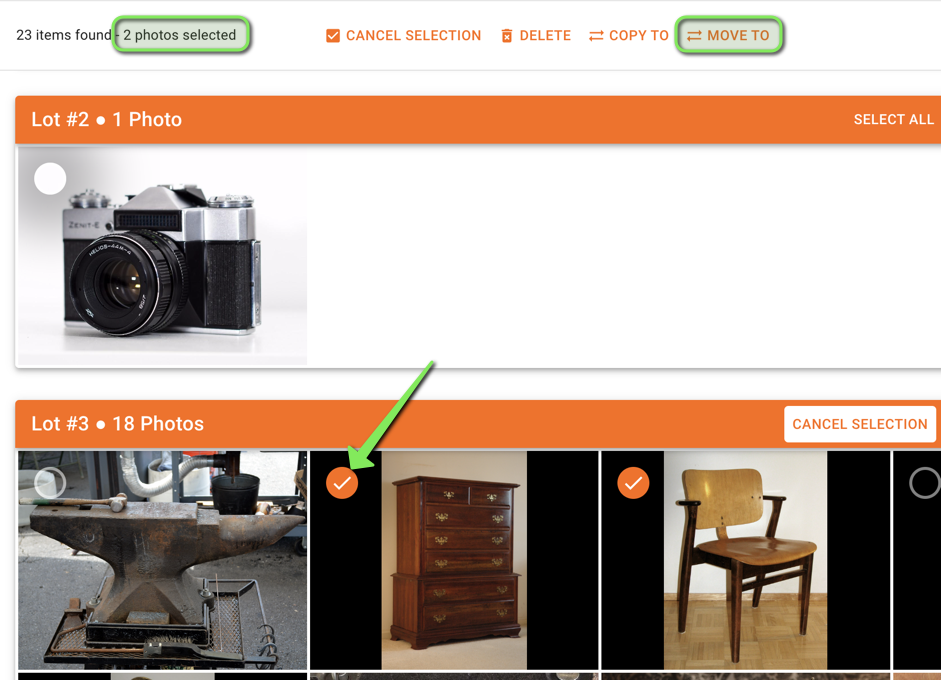
Clicking on Select icon located in the top right of every image, you may select images across all lots. How many photos that have been selected is presented in the top left of the screen. You can also Shift+Click to select multiple images at once as shown below:
One of the three options presented in the top-most toolbar is a bulk "Move To" function. You can then choose which Lot ID Number you would like to move all selected photos to.
Duplicate and Copy Images
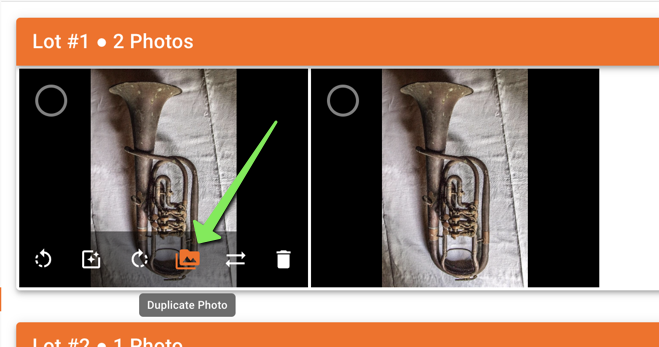
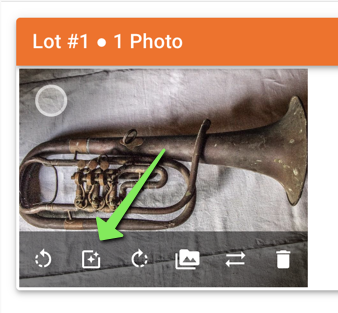
Click on the Duplicate Photo button to duplicate a specific image within a lot. A duplicate image will be created and added directly after the original image.
You may also select images within one lot or among different lots and click "Copy To" in the selected images toolbar at the top of the screen. A pop-up will appear that allows you to type in which specific Lot ID Number that you would like to copy and move all duplicated images to. Include lot numbers that don't exist to create them.
Editing Images
Rotate Images
Hovering over any image will present a toolbar of options. Two of these buttons allow you to quickly rotate clockwise or counter clockwise. Rotating an image from this screen will not force the image to adhere to our 4:3 aspect ratio (which means that the image will not zoom in).
Cropping Images
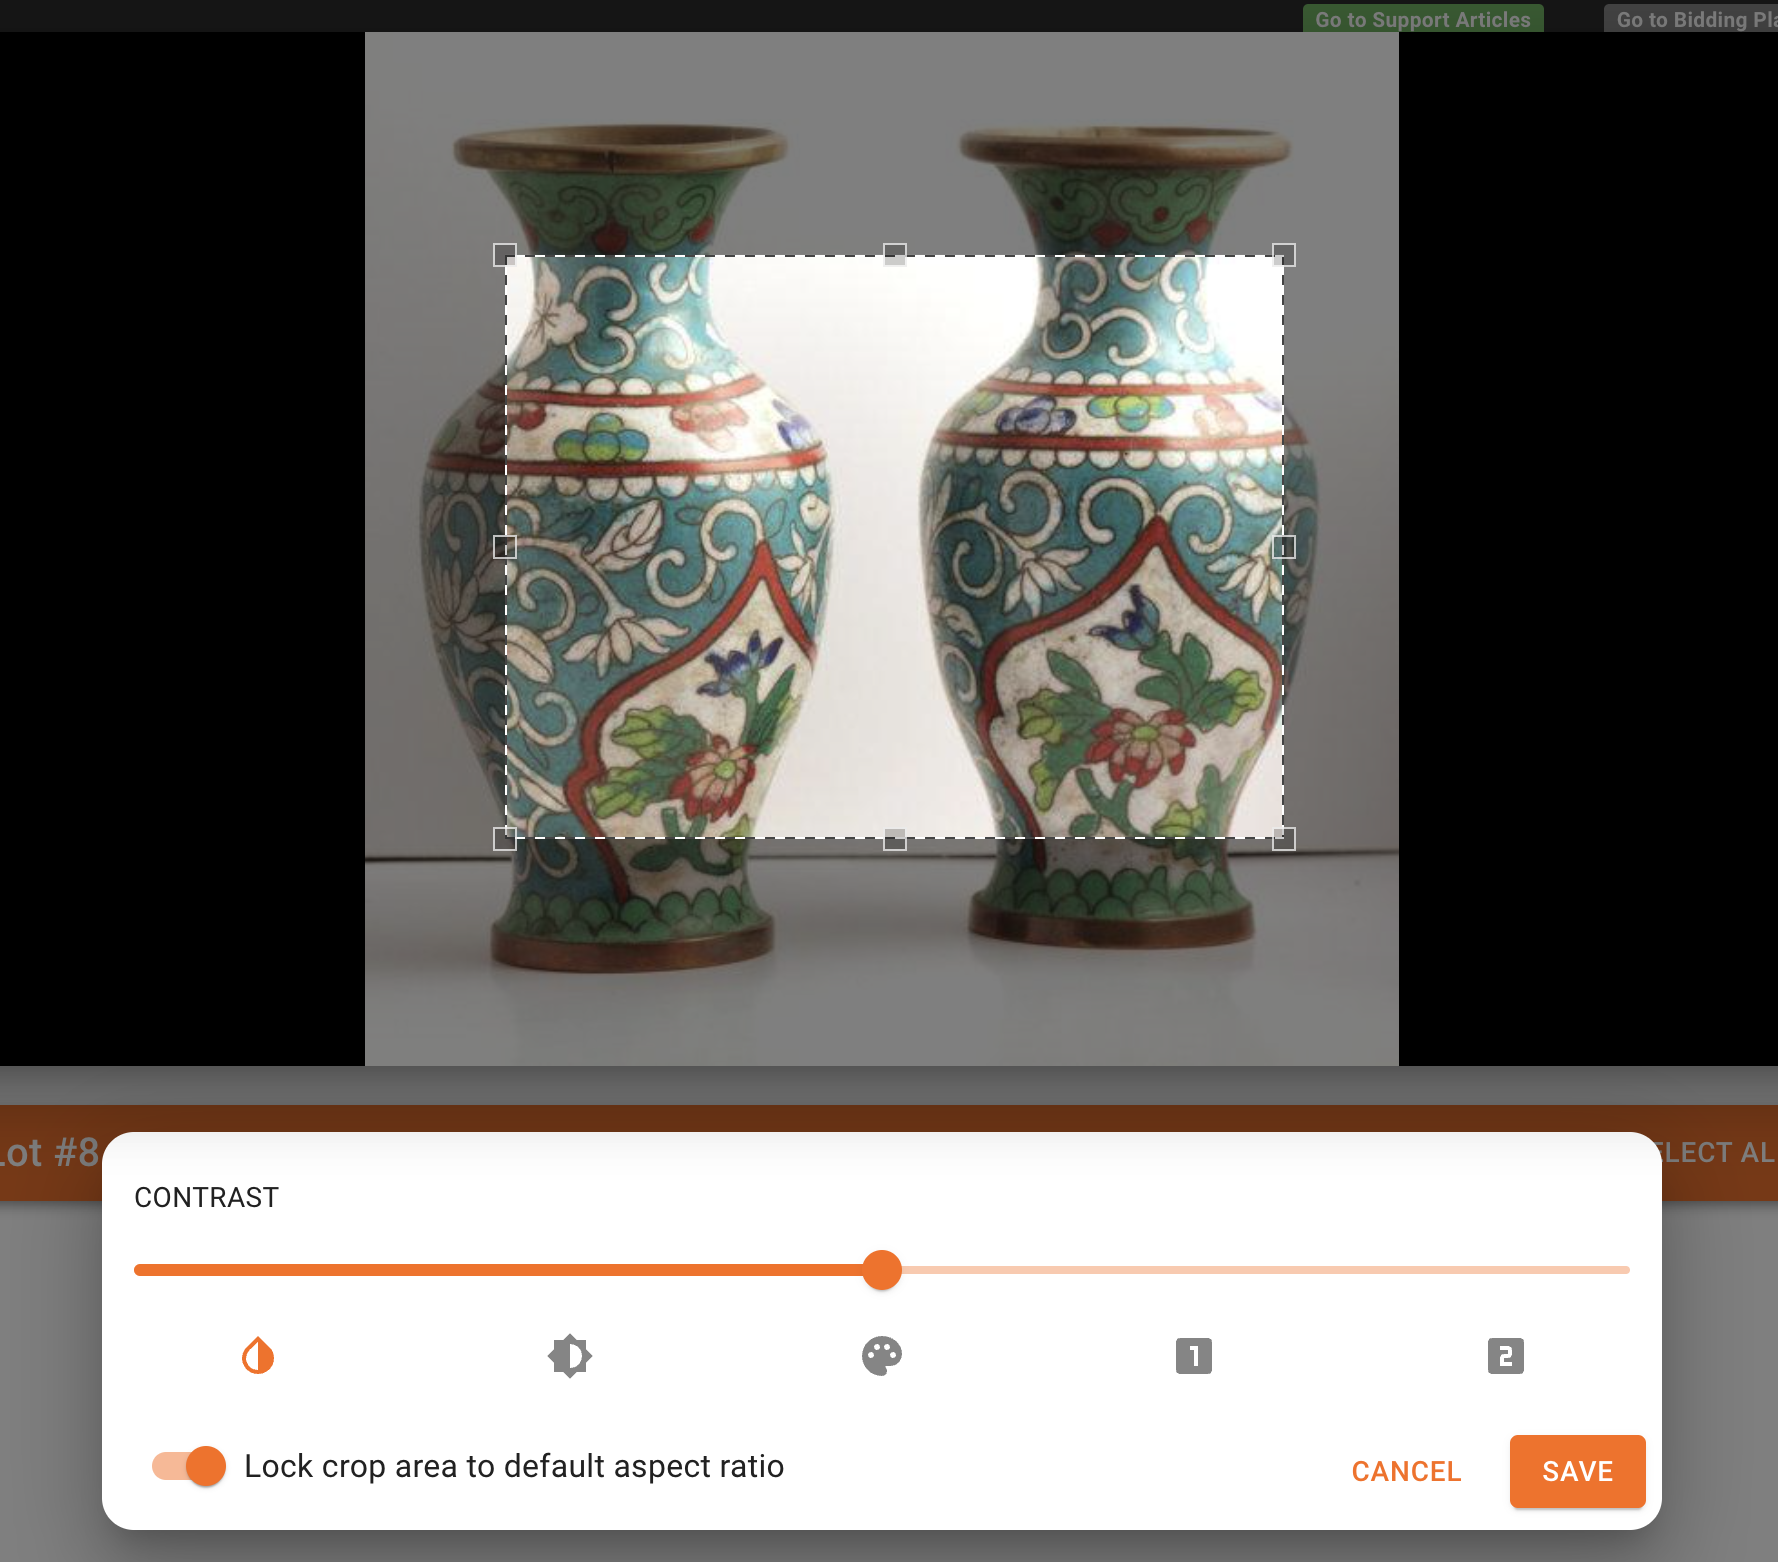
Click on the Photo Editor button on any image to access the Photo Editor screen.
From the Photo Editor screen, the "Lock crop area to default aspect ration" switch will be enabled by default. To crop to our 4:3 aspect ratio, leave this enabled and click and drag on the image to start cropping the image.
Disabling this switch will allow you crop without the 4:3 aspect ration restriction as shown below:
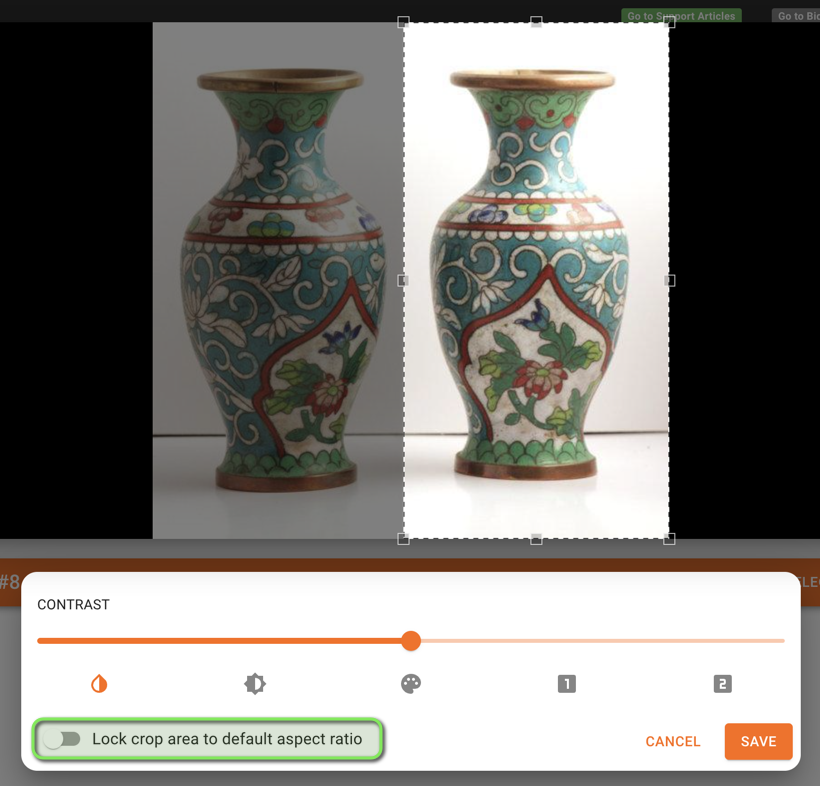
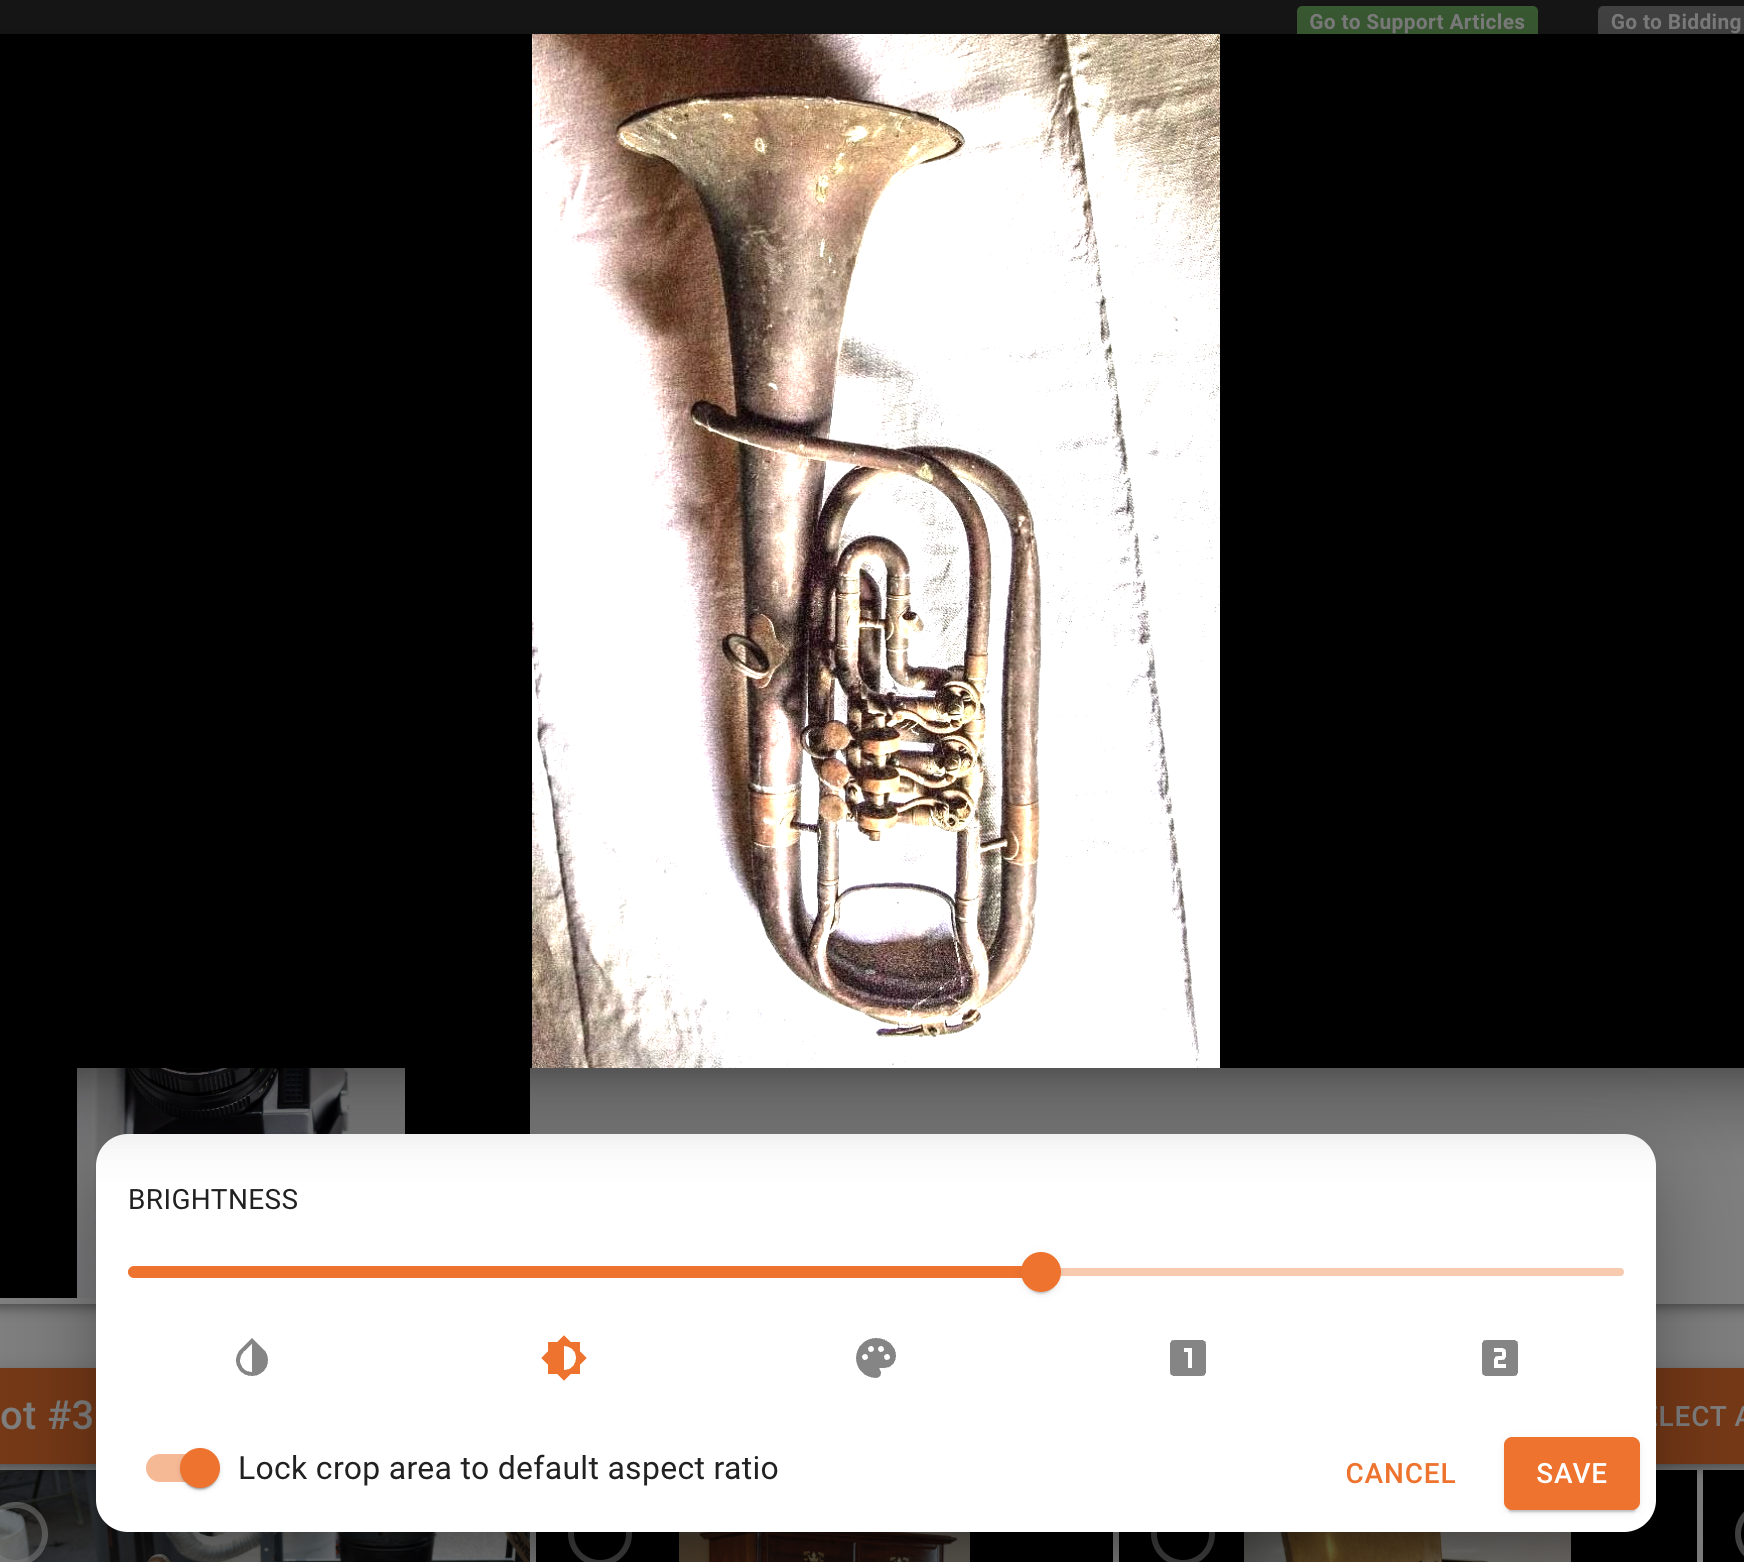
Editing Contrast, Brightness, or Saturation
Clicking on the Photo Editor button allows more than just cropping. You may also edit contrast, brightness, or saturation using a simple slider. Holding down on the "1" or "2" buttons allow you to save what you have edited as a preset as well.
Adjust levels automatically via the auto-enhance button:
Delete Images
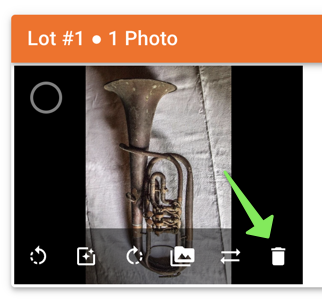
Individual images can be deleted by hovering over the image and clicking the trashcan icon.
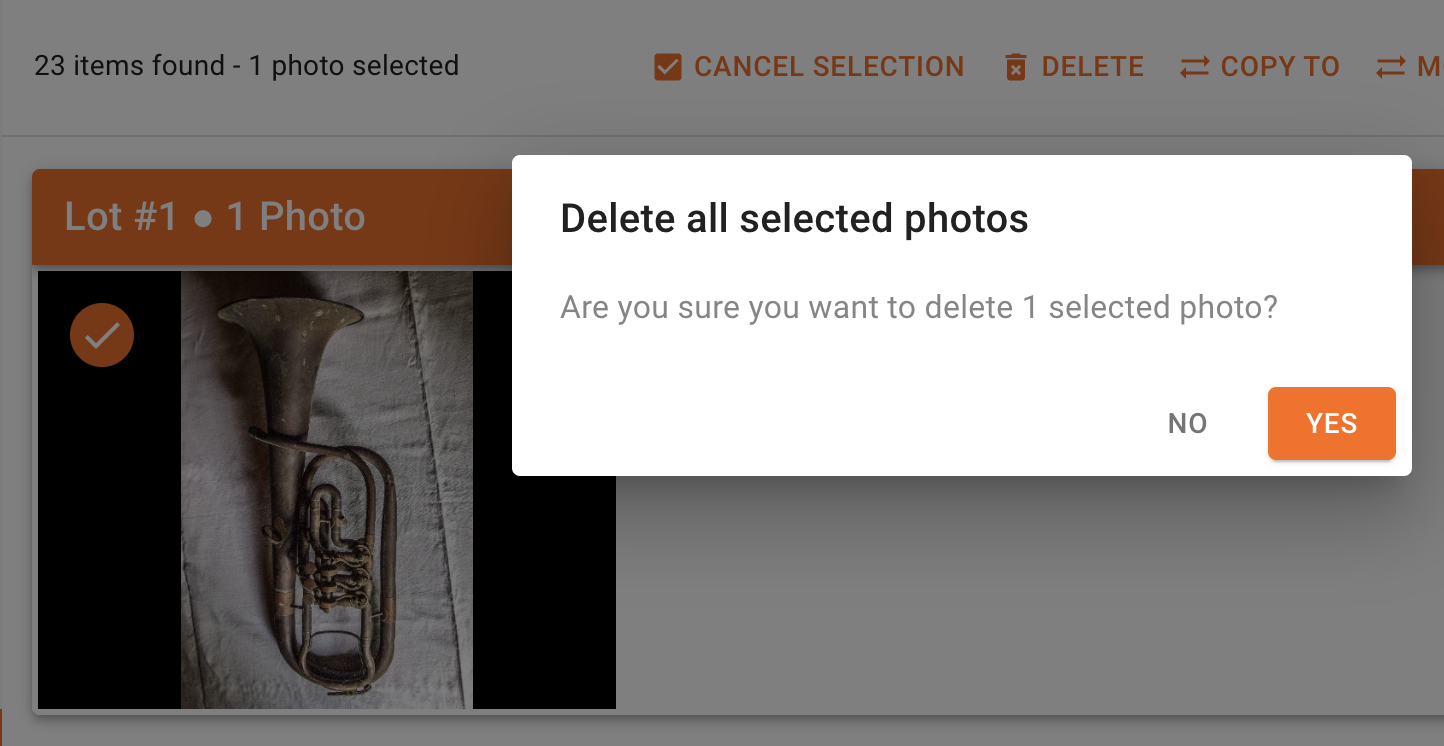
Multiple images can be selected and deleted in bulk by clicking "DELETE" in the selected items tool bar. You will receive a prompt asking if you are sure you want to delete the selected photos.
Export Images
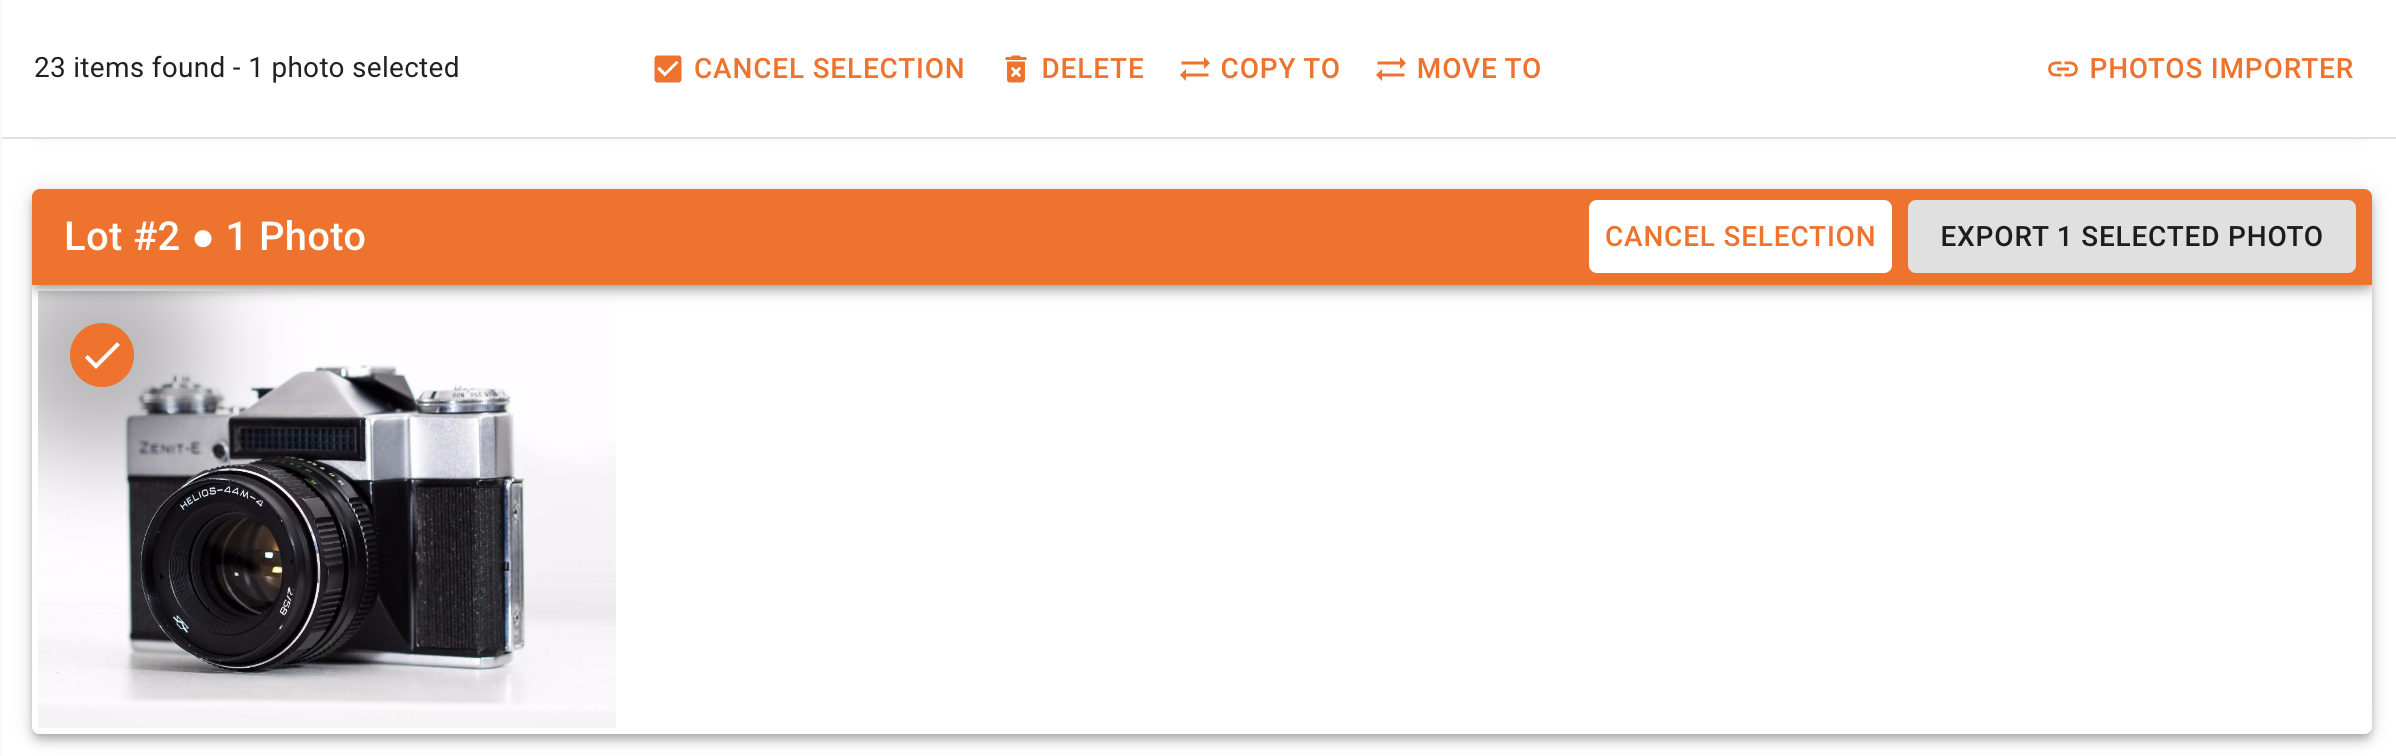
The Photo Manager screen allows you to export all images on a specific lot (EXPORT ALL ITEM'S PHOTOS), all photos in the auction (EXPORT ALL PHOTOS), or all selected photos.
To export selected lots' images, select the desired lots, then the "EXPORT ALL PHOTOS" button at the top of the screen will change to "EXPORT # SELECTED PHOTOS".
Photos Importer
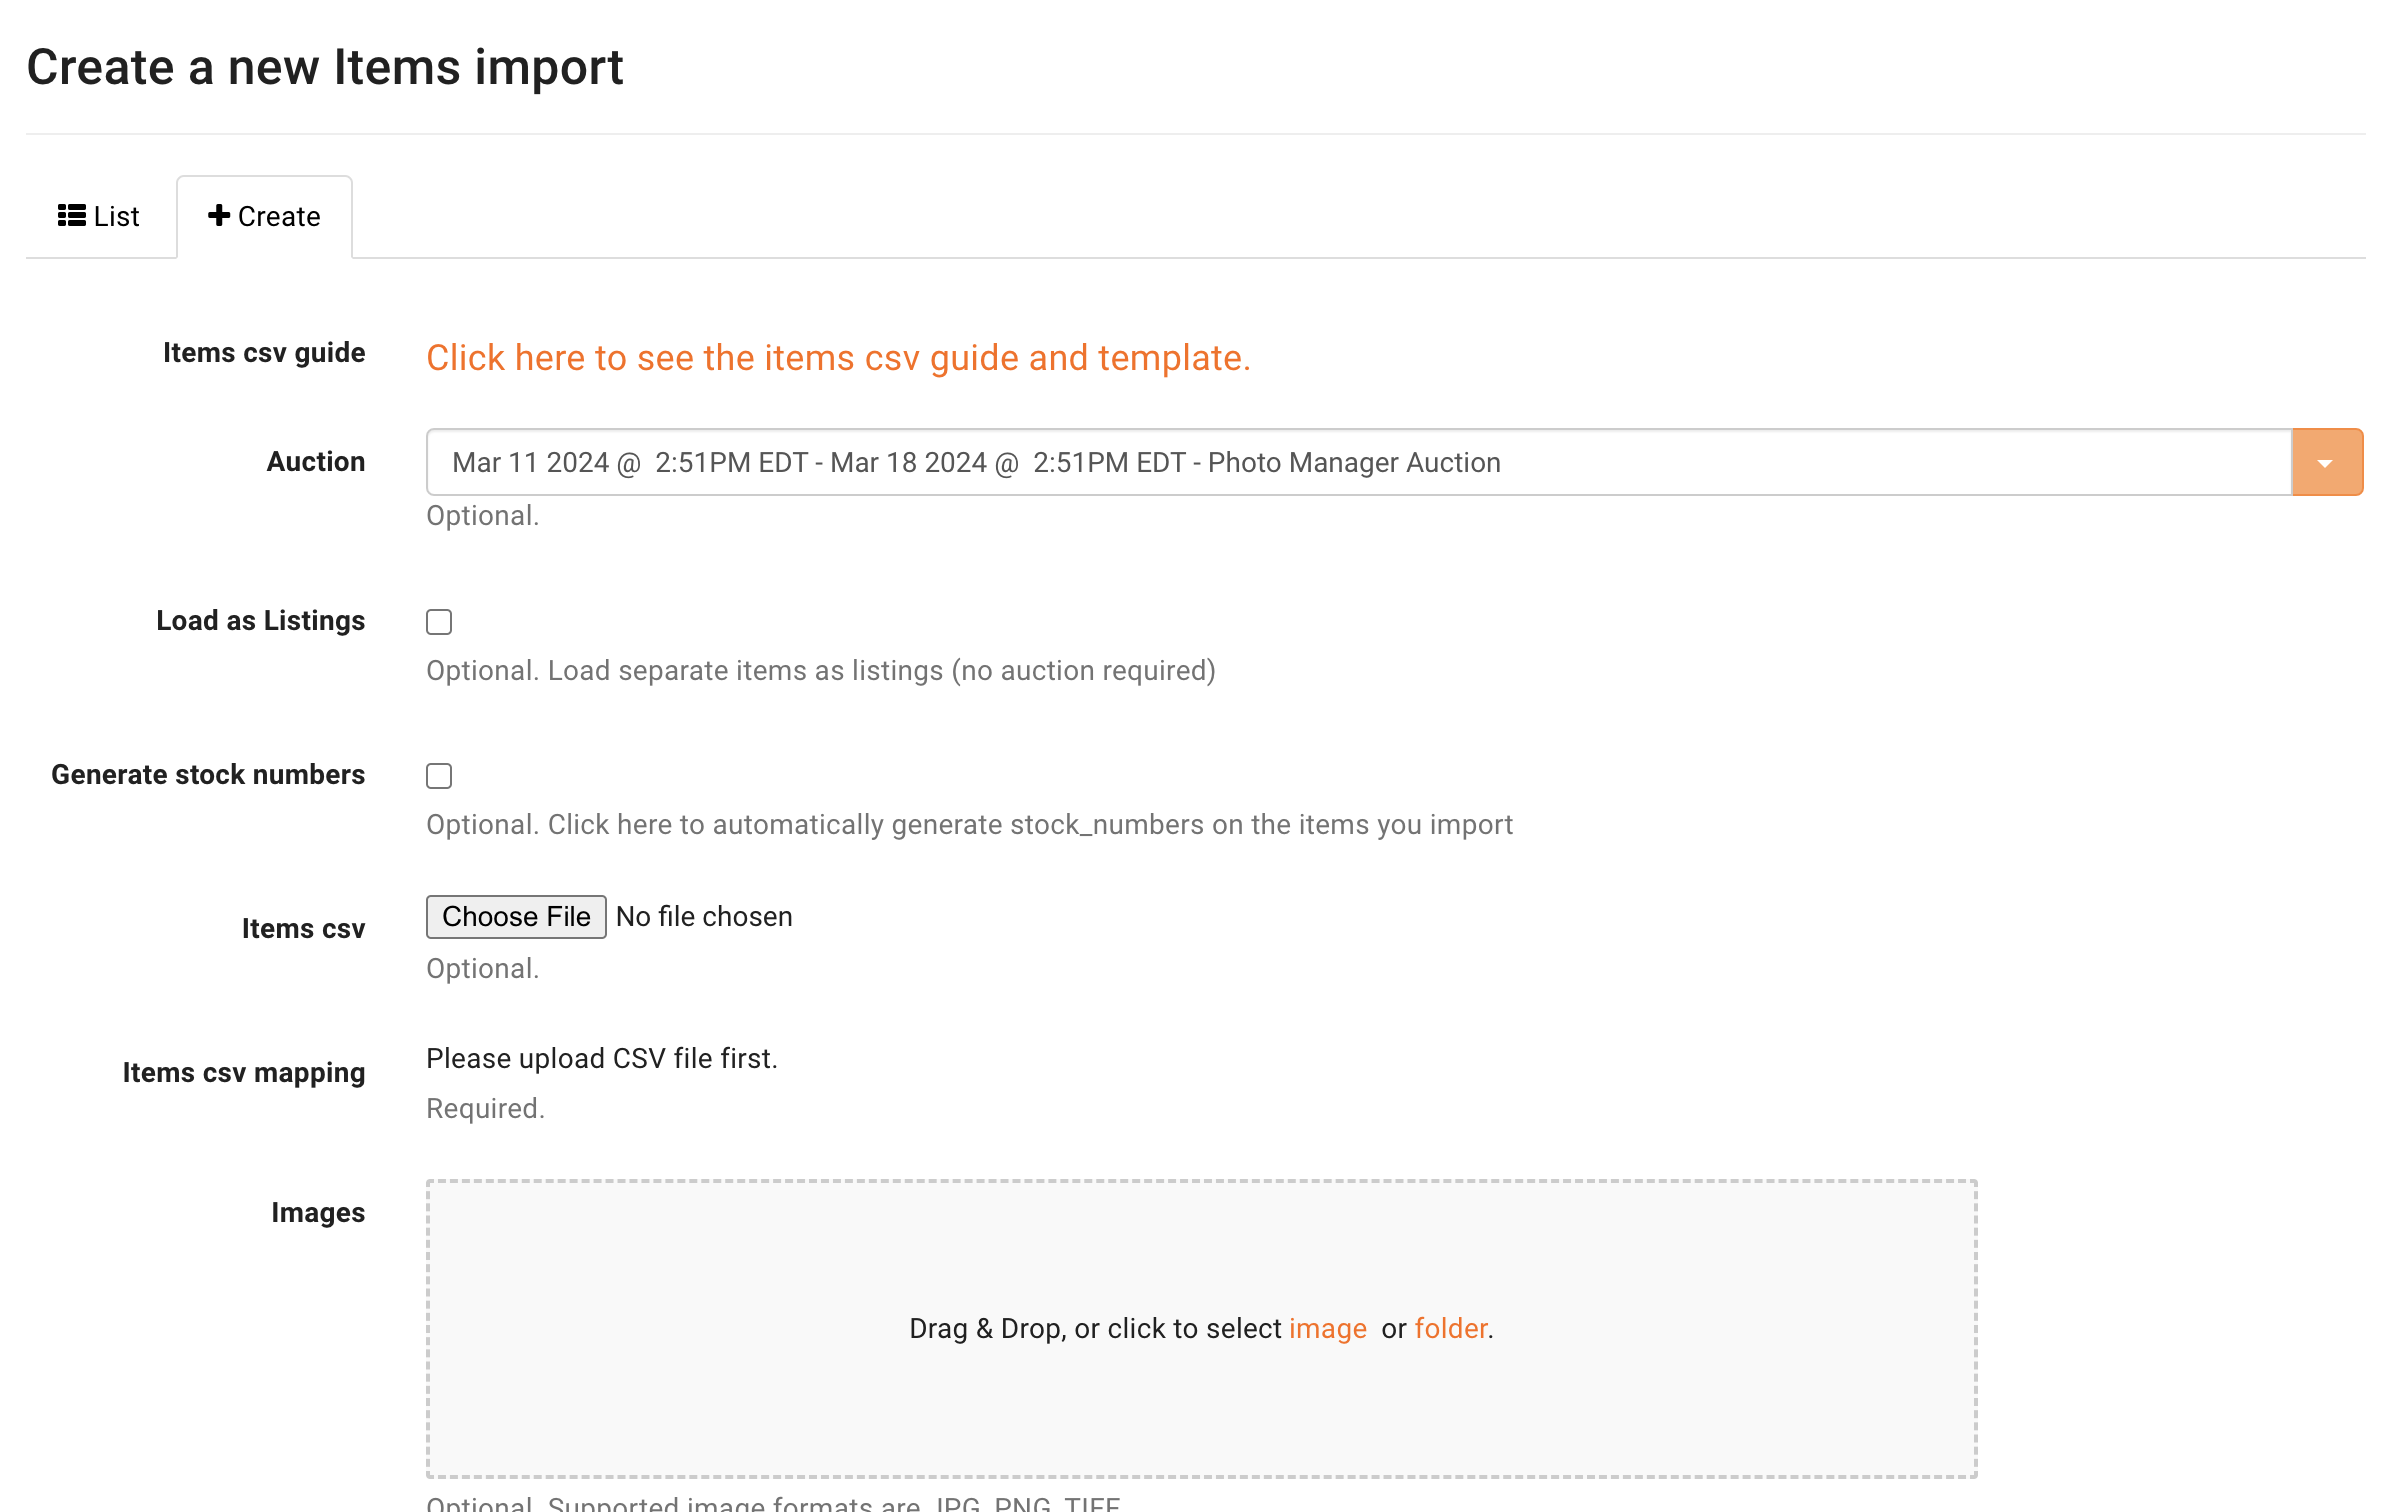
From this screen, you can quickly navigate to a pre-filtered item/image import by clicking on the "PHOTOS IMPORTER" button.
You will then be linked to a new item import within the Items Import screen with the auction pre-loaded in Auction selection field. For more information on item imports, please click here.
If you have any questions regarding the Photo Manager screen, please contact us at helpdesk@bidwrangler.com and we will be happy to help!